


Masking hair
One of the more challenging aspects of masking is being confronted with fine details such as hair, which require Photoshop’s powerful mask refinement tools:
- Go to File → Open and navigate to the
03-Maskingfolder. SelectCutout.jpgand click Open when done. - Switch to the Object Selection tool. Click on the Select Subject button in the options bar to create a selection of the woman. Then click on the Select and Mask button in the options bar (Figure 3.14, A).
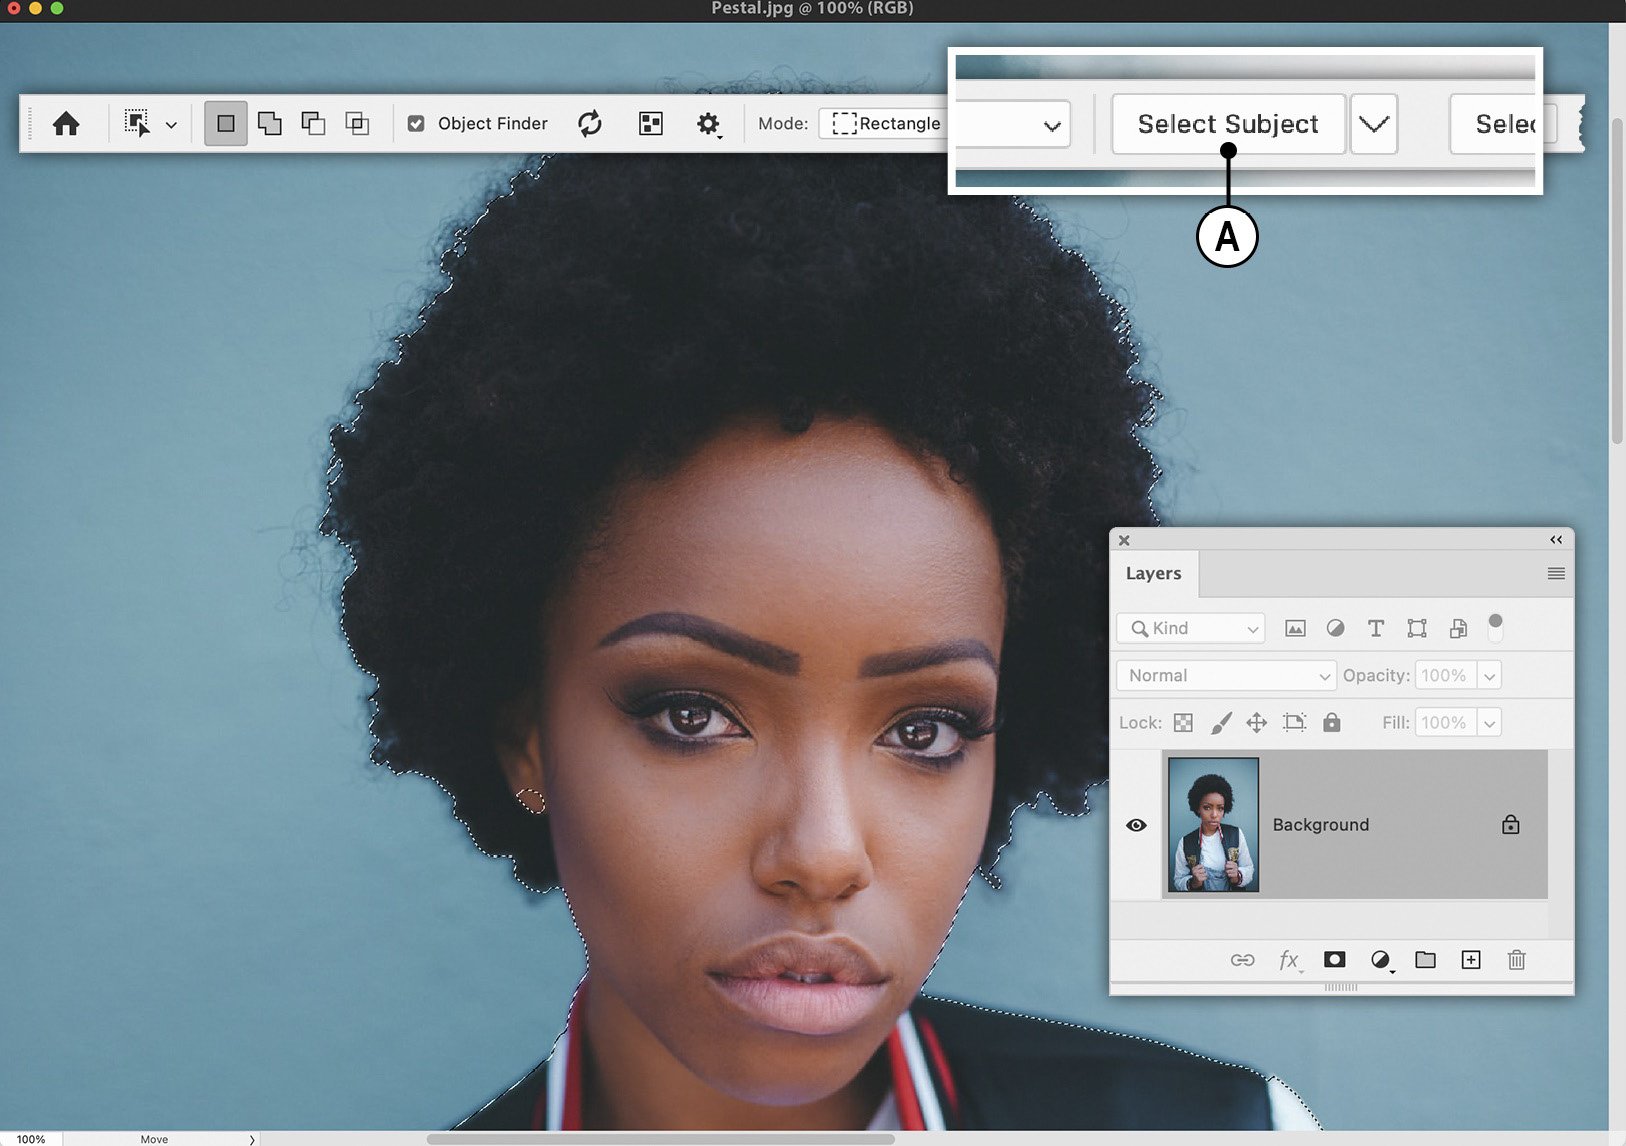
Figure 3.14: Use the Select Subject feature to make your base selection
- When the dialog appears, change the View drop-down thumbnail (Figure 3.15, A) to Overlay. This will allow you to preview the region outside of your selection in a temporary color of your choosing.
- You will need to change the overlay color to one that contrasts with the hair and the original background of the photo. Click on the color picker (E), choose a bright green color, and...


