Search icon CANCEL
Subscription
0
Cart icon
Your Cart (0 item)
Close icon
You have no products in your basket yet
Save more on your purchases! discount-offer-chevron-icon
Savings automatically calculated. No voucher code required.
Arrow left icon
Explore Products
Best Sellers
New Releases
Books
Videos
Audiobooks
Learning Hub
Newsletter Hub
Free Learning
Arrow right icon
timer SALE ENDS IN
0 Days
:
00 Hours
:
00 Minutes
:
00 Seconds
Arrow up icon
GO TO TOP
Getting Started with Dynamics NAV 2013 Application Development

You're reading from   Getting Started with Dynamics NAV 2013 Application Development Using this tutorial will take you deeper into Dynamics NAV from a developer's viewpoint, and allow you to unlock its full potential. The book covers developing an application from start to finish in logical, illuminating steps.

Arrow left icon
Product type Paperback
Published in May 2013
Publisher Packt
ISBN-13 9781849689489
Length 230 pages
Edition 1st Edition
Arrow right icon
Author (1):
Arrow left icon
Alex Chow Alex Chow
Author Profile Icon Alex Chow
Alex Chow
Arrow right icon
View More author details
Toc

Table of Contents (17) Chapters Close

Getting Started with Dynamics NAV 2013 Application Development
Credits
About the Author
About the Reviewers
www.PacktPub.com
Preface
1. Getting Dynamics NAV 2013 on Your Computer – For (Almost) Free FREE CHAPTER 2. Getting Familiar with Dynamics NAV 2013 3. Exploring the Data Structure and Basic Layout of Dynamics NAV 4. Determining a Task List 5. Finding Similar Functions for Inspiration 6. Creating the Application – Tables 7. Creating the Application – Pages and Reports 8. Extending Our Application 9. Dynamics NAV Modules to Address the Specific Needs of Your Business Additional Resources and Conclusion Index

Create an analysis report using wizards


Going back to the requirement list, one of the things that the users want is to be able to create a simple report to display the items that are accepted and rejected. So, the report will display the item, then the complaint lines that are associated with the item.

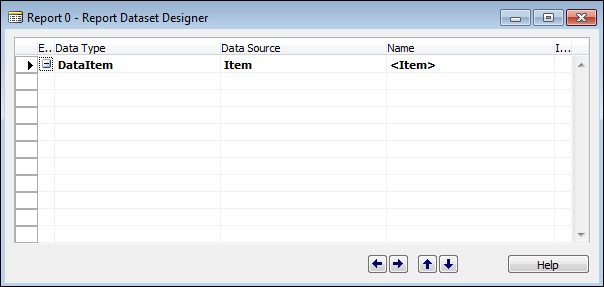
From Object Designer, click on Reports and click on New to create a new report. For Data Source, we want to start off using our Item table:
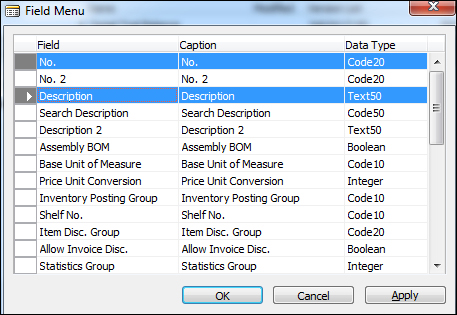
To automatically fill in the fields we want to display on the report, we click on the View | Field Menu option. When the Field Menu screen appears, simply highlight the fields you want and click on OK to have it inserted into Report Designer.

For our report, we will add the No. and Description fields from the Item table:
Now we will add in the second Data Source value, which in this case is the Complaint Line table:
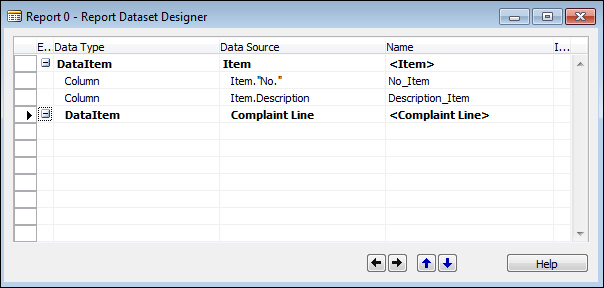
Bring up Field Menu and add the fields we want printed from Complaint Line. After adding the fields, mark the Include Caption checkbox on the...

lock icon The rest of the chapter is locked
Register for a free Packt account to unlock a world of extra content!
A free Packt account unlocks extra newsletters, articles, discounted offers, and much more. Start advancing your knowledge today.
Unlock this book and the full library FREE for 7 days
Get unlimited access to 7000+ expert-authored eBooks and videos courses covering every tech area you can think of
Renews at $19.99/month. Cancel anytime
Banner background image