The board has finally arrived. The box should contain the board and a USB cable that can power the board. Let's just look at a few notes on the Beagle Bone Blue first:
This board is an evolved version of the BeagleBone Black, which was an evolved version of the BeagleBone. They are all the same size, but the BeagleBone Blue adds a lot of new capabilities that, in the past, you'd need to add using external hardware. Specifically, the Blue adds the ability to control servos and DC motors directly, has built-in wireless LAN and Bluetooth, and also a built-in IMU and barometer. But more about all of this impressive capability later.
Before plugging anything in, inspect the board for any issues that might have occurred during shipping. This is normally not a problem, but it is always good to do a quick visual inspection. You should also acquaint yourself with the different connections on the board. Here is the board, with some of the more important connections labelled for your information:
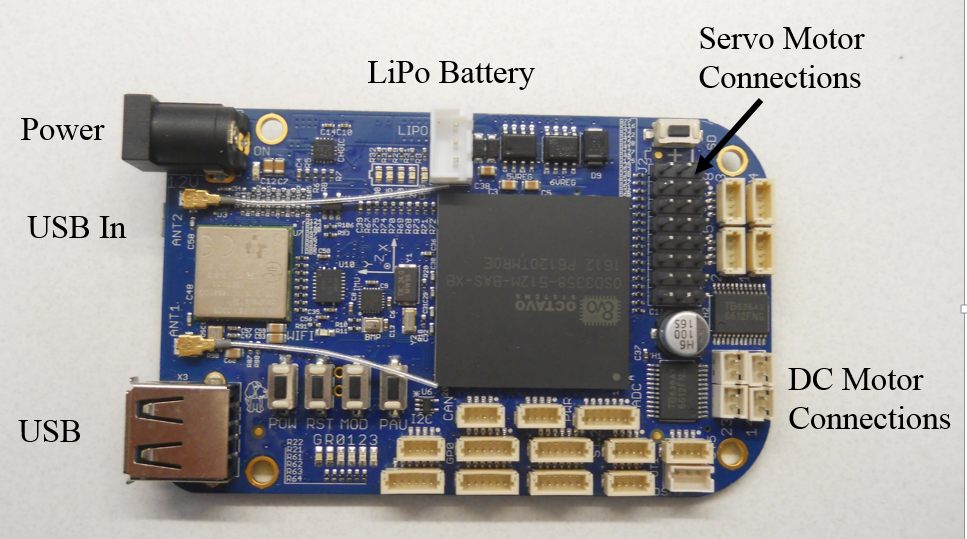
And here is the other side:
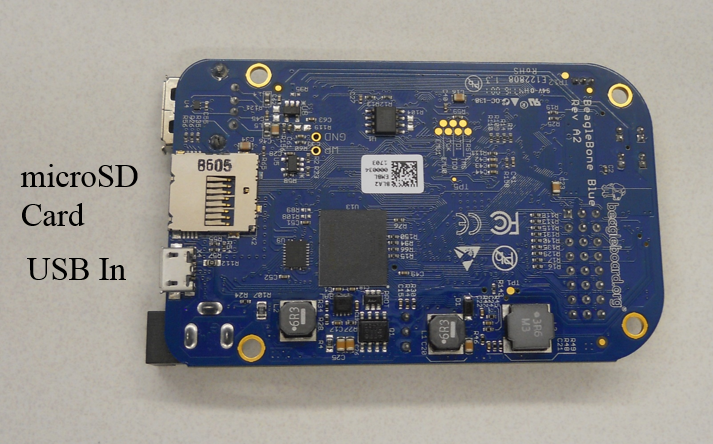
So, let's get started. First, you'll need to power the board.
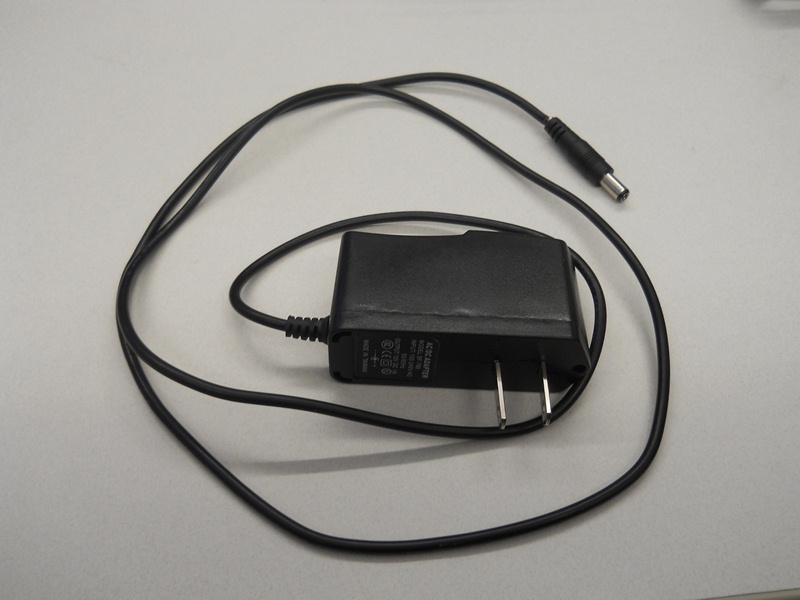
There are several ways to power the BeagleBone Blue. There is a standard DC power connector on the board. This power connector accepts voltages from 8 to 18 VDC in a 5.5 x 2.1 mm connector. This is the connection you would use if you wanted to plug the unit into a wall adapter--one that can provide from 8 to 18 volts and at least 1 amp, such as this one:
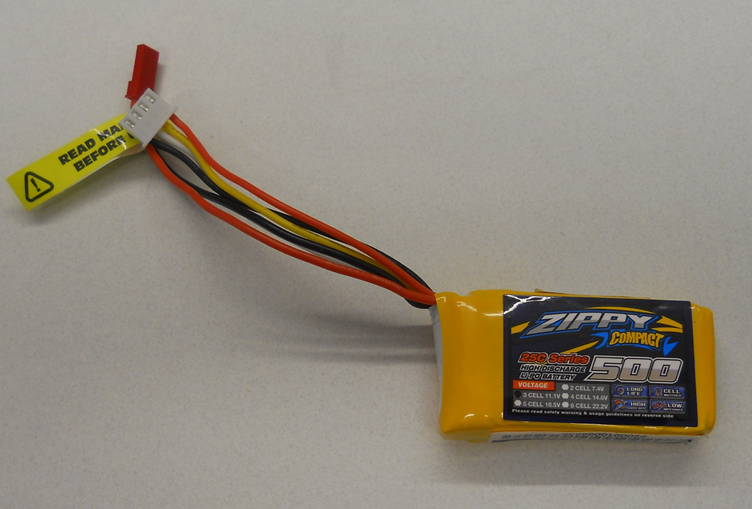
There is also a LiPo battery connector that connects to a two-cell, 7.4V LiPo battery, such as the one pictured here:
You can also connect the BeagleBone Blue to a host computer using a USB cable, with a standard-sized USB connector to connect to the host computer on one end and a micro-USB connector to connect to the BeagleBone Blue. No matter which power source you use, you'll need to make sure the unit can supply the power to the BeagleBone Blue as well as to any additional hardware that is attached to the board. If you have nothing else attached, the board can draw up to 1 amp. You may need several amps more if you are connecting to servo or DC motors, but let's start with a simple connection for your host computer that not only will provide power but will also allow you to make your first contact with the board. So plug the standard USB cable end into the host USB port and the microUSB connector in the USB In connection on the back side of the BeagleBone Blue.
When you plug the board in, the PWR LED should glow blue on the board. There are two sets of LEDs that will give you additional indications of activity. Here is a microUSB-up of the board, just so you're certain which one to look for:
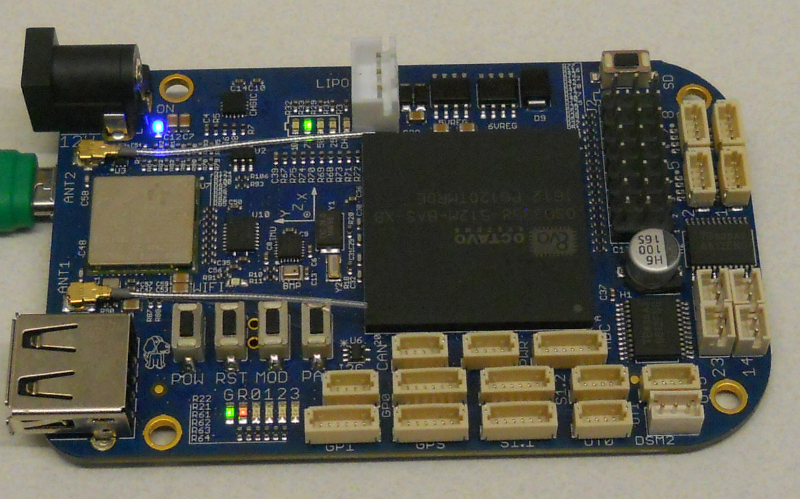
The LEDs labelled GR0123 are the indicators that are useful for indicating the state of the board. They will all flash on and then, eventually, the LED labelled 0 will flash on and off as a heartbeat indicator: this lets you know that your processor is working.
Now we can use some computer SW to make sure our board is operating correctly. When you first plug the board into a Windows PC, you'll see the indicator in the lower right indicating that new HW is being installed. Eventually--and this may take a while--you'll get the indication that your device is ready to use. If you are using Windows 7, you can view the device in your Devices and Printers display (select this from the Start menu).
You should see the following:
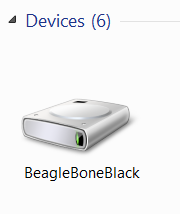
If you see this, and LED 0 is flashing in a heartbeat fashion, you've successfully connected your board. Once you've connected, you can actually talk with your board via the USB connection. To do this, you'll first connect via serial port, but you'll need to know which port. To discover this, click on the BeagleBoneBlack connection, and you should see this selection:
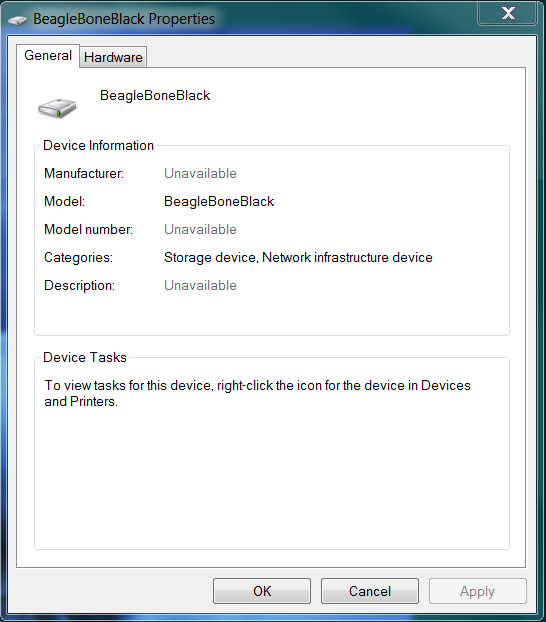
Now, click on the Hardware tab, and you should see this:
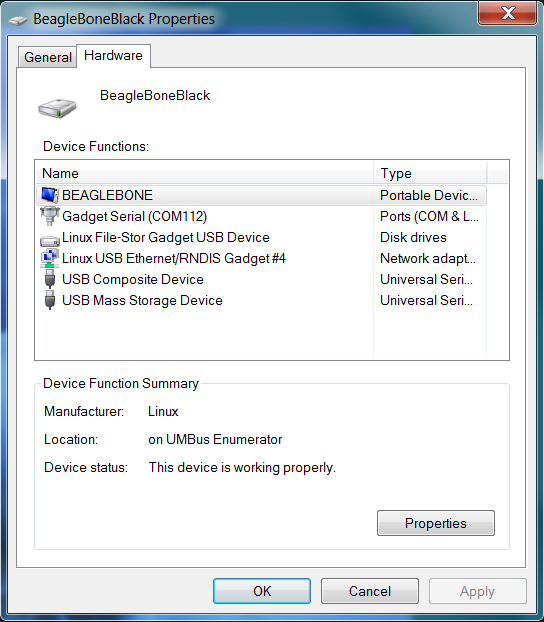
In this case, the unit is connected to serial port COM112. You'll need a terminal emulator program to connect to the board--PuTTY is one that is readily available and free. Go to http://www.chiark.greenend.org.uk/~sgtatham/putty/latest.html, and download and install the latest version.
Now open the PuTTY application. You should see this:
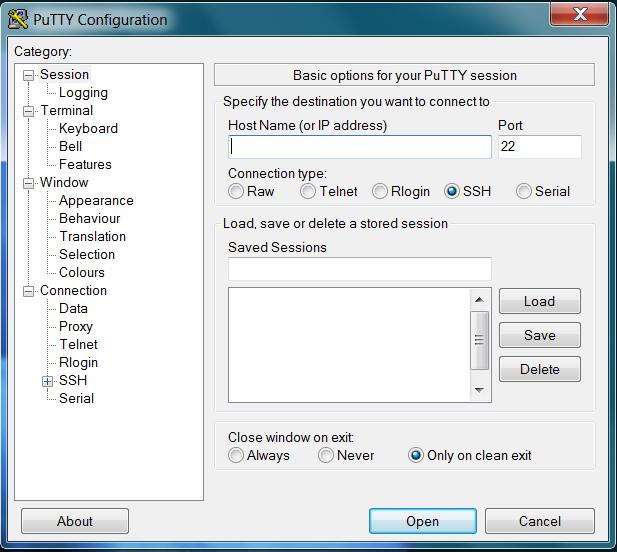
You'll need to establish a serial connection to the BeagleBone Blue. To do this, fill out the following on PuTTY:
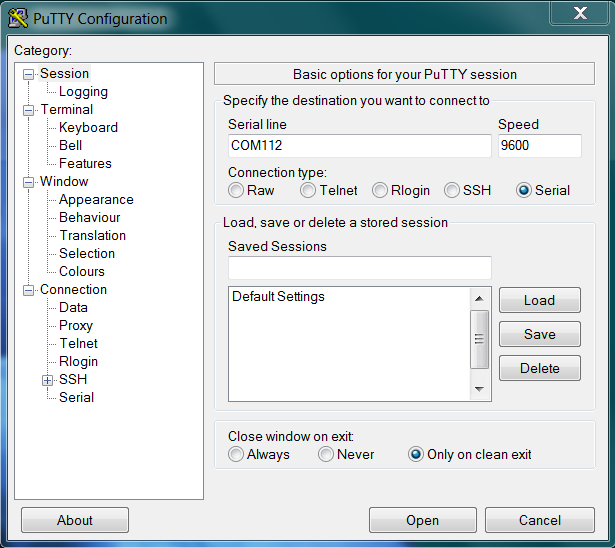
In this case, I've also saved these settings under the Default Settings label. That way, you won't need to re-enter these each time. Now select Open, and you should see the Terminal window open to the BeagleBone Blue. When the window opens, place your mouse in the window, select it, and then hit Enter; you should see this:
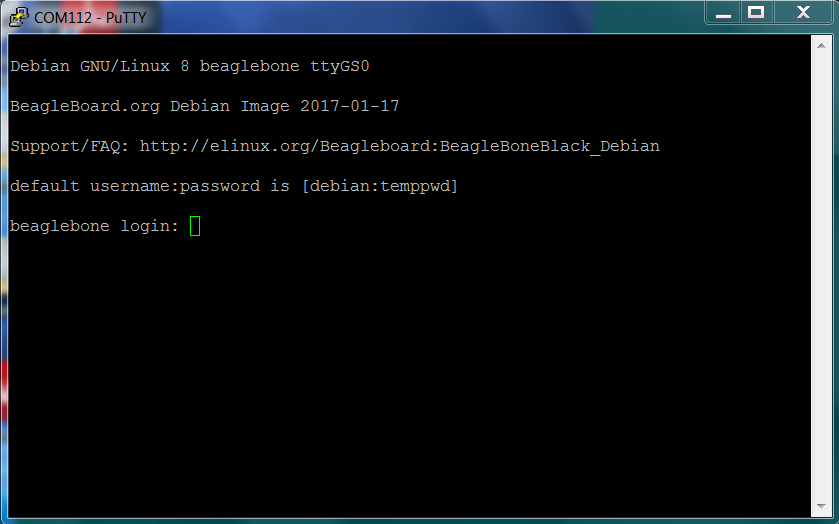
You can log in by typing the default username and password, debian and temppwd, respectively. Now you should see this:
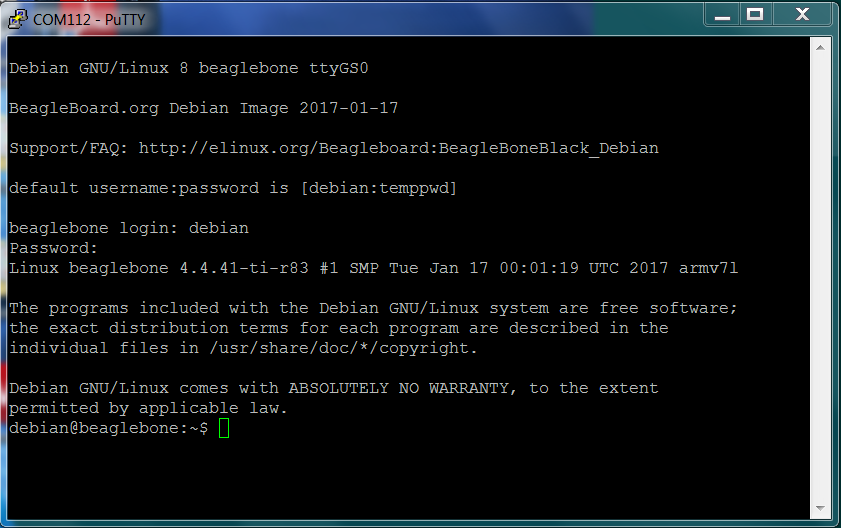
If you've reached this point, congratulations! You are logged in and ready to interact with your BeagleBone Blue. By the way, you'll notice that the board does not echo the characters as you enter your password. It does not want someone to look over your shoulder and see your password as you type. Despite no characters appearing on the screen, your password is being entered.
If you're having problems, the folks at beagleboard.org have a rich set of forums that can help you work through any of the problems you might be having unpacking and powering on the board.


