Search icon CANCEL
Subscription
0
Cart icon
Your Cart (0 item)
Close icon
You have no products in your basket yet
Arrow left icon
Explore Products
Best Sellers
New Releases
Books
Videos
Audiobooks
Learning Hub
Conferences
Free Learning
Arrow right icon
Arrow up icon
GO TO TOP
Azure Active Directory for Secure Application Development

You're reading from   Azure Active Directory for Secure Application Development Use modern authentication techniques to secure applications in Azure

Arrow left icon
Product type Paperback
Published in May 2022
Publisher Packt
ISBN-13 9781838646509
Length 268 pages
Edition 1st Edition
Tools
Arrow right icon
Author (1):
Arrow left icon
Sjoukje Zaal Sjoukje Zaal
Author Profile Icon Sjoukje Zaal
Sjoukje Zaal
Arrow right icon
View More author details
Toc

Table of Contents (14) Chapters Close

Preface 1. Part 1: Getting Started with the Microsoft Identity Platform
2. Chapter 1: Microsoft Identity Platform Overview FREE CHAPTER 3. Chapter 2: Azure AD Application Model 4. Chapter 3: Application Types and User Consent 5. Part 2: Authentication and Protocols
6. Chapter 4: The Basics and Evolution of Authentication 7. Chapter 5: Securing Applications with OAuth 2.0, OpenID Connect, and MSAL 8. Chapter 6:Building Secure Services Using the Microsoft Graph API 9. Part 3: Azure AD B2C
10. Chapter 7: Introducing Azure Active Directory B2C 11. Chapter 8: Advanced Features of Azure AD B2C 12. Chapter 9: Azure AD B2C Custom Policies 13. Other Books You May Enjoy

Adding a user to Azure AD

Now that we have our Azure AD tenant in place, we can add our first user to it. For this, you have to take the following steps:

  1. We first need to ensure that the new directory that was created in the previous step is active. For this, we need to select the directory icon in the top-right menu, and then select the Azure AD tenant that we have just created:
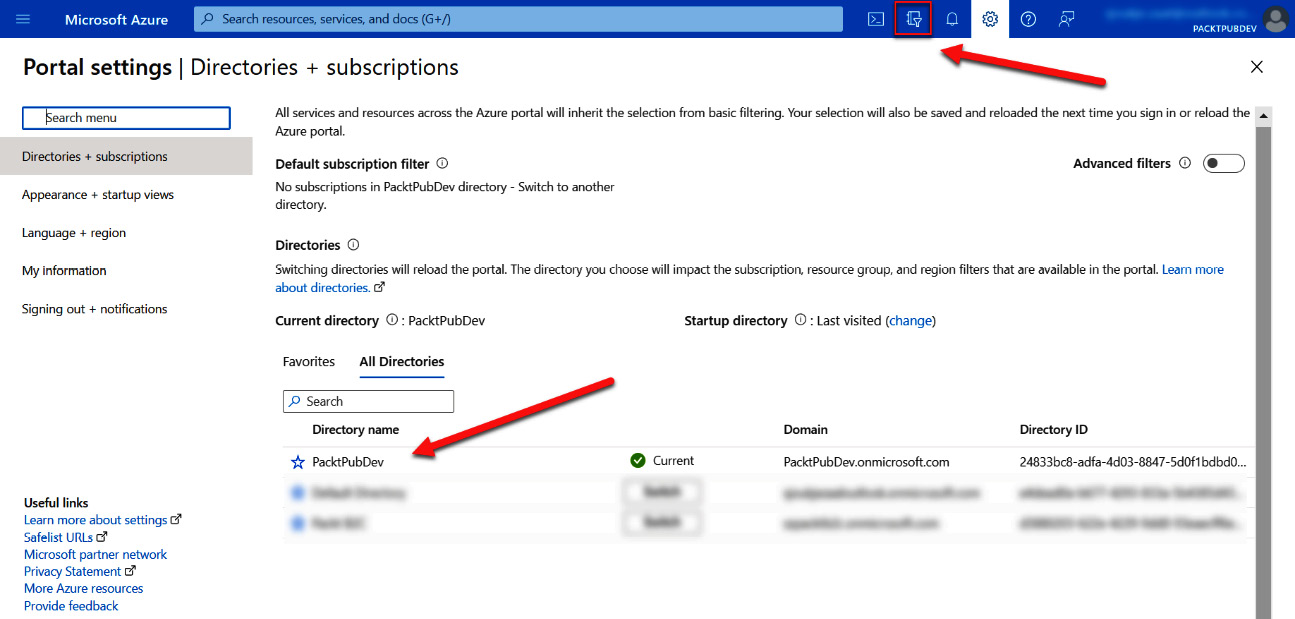
Figure 1.6 – Selecting the new Azure AD tenant

Figure 1.6 – Selecting the new Azure AD tenant

Tip

If the directory is not yet available in the list, you need to log out and log in again. Then, open the directory menu again and select the directory.

  1. Now that we have selected the right directory, we can navigate to the Azure AD tenant.
  2. On the Overview page of the Azure portal, type Azure Active Directory in the top search box and select it. The Azure AD Overview page will be displayed.
  3. In the left menu, under Manage, select Users:
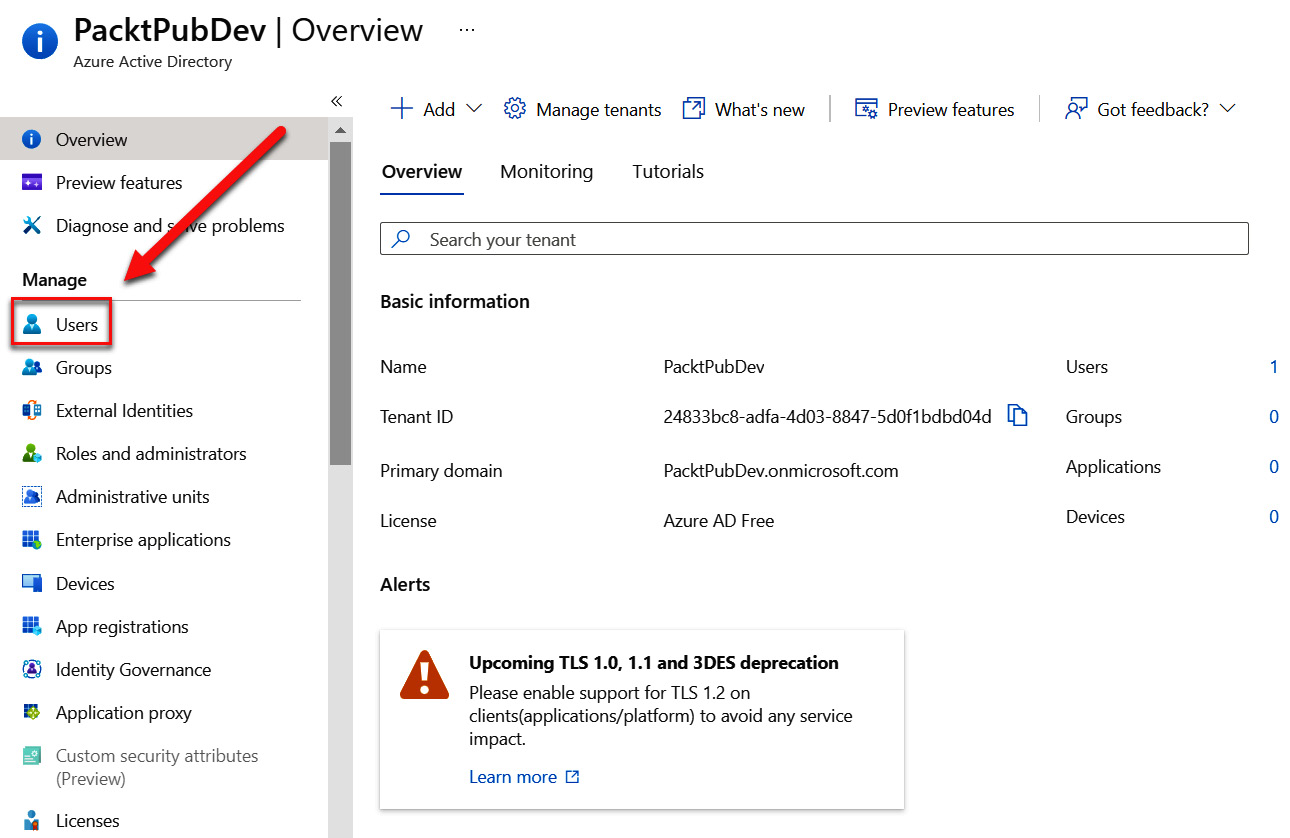
Figure 1.7 – Selecting Users in the menu

Figure 1.7 – Selecting Users in the menu

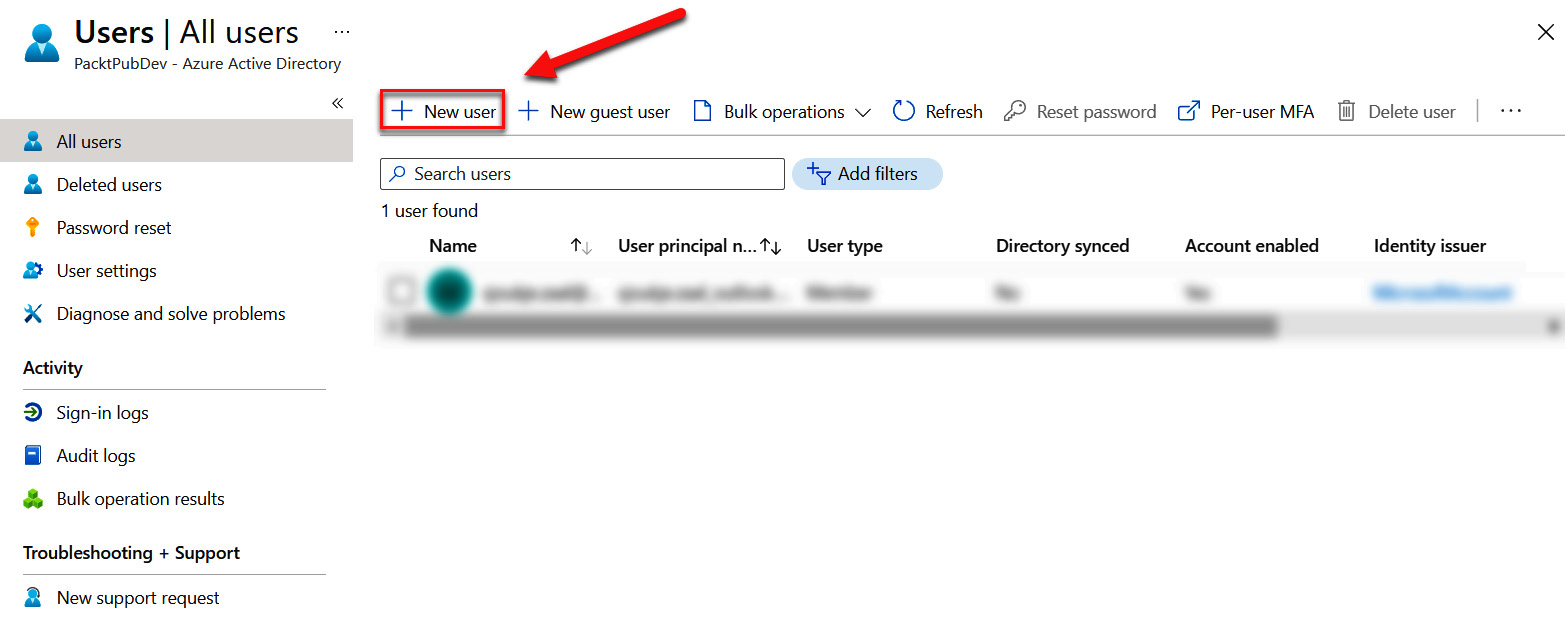
  1. In the top menu, select + New user:
Figure 1.8 – Creating a new user

Figure 1.8 – Creating a new user

  1. Specify the required values as follows:
    • Username: packdemouser1.
    • Name: Packt DemoUser1.
    • First name: Packt.
    • Last name: DemoUser1.
    • Password: You can choose between letting Azure auto-generate a password or creating your own password. In this case, leave the default value.

This will look like the following screenshot:
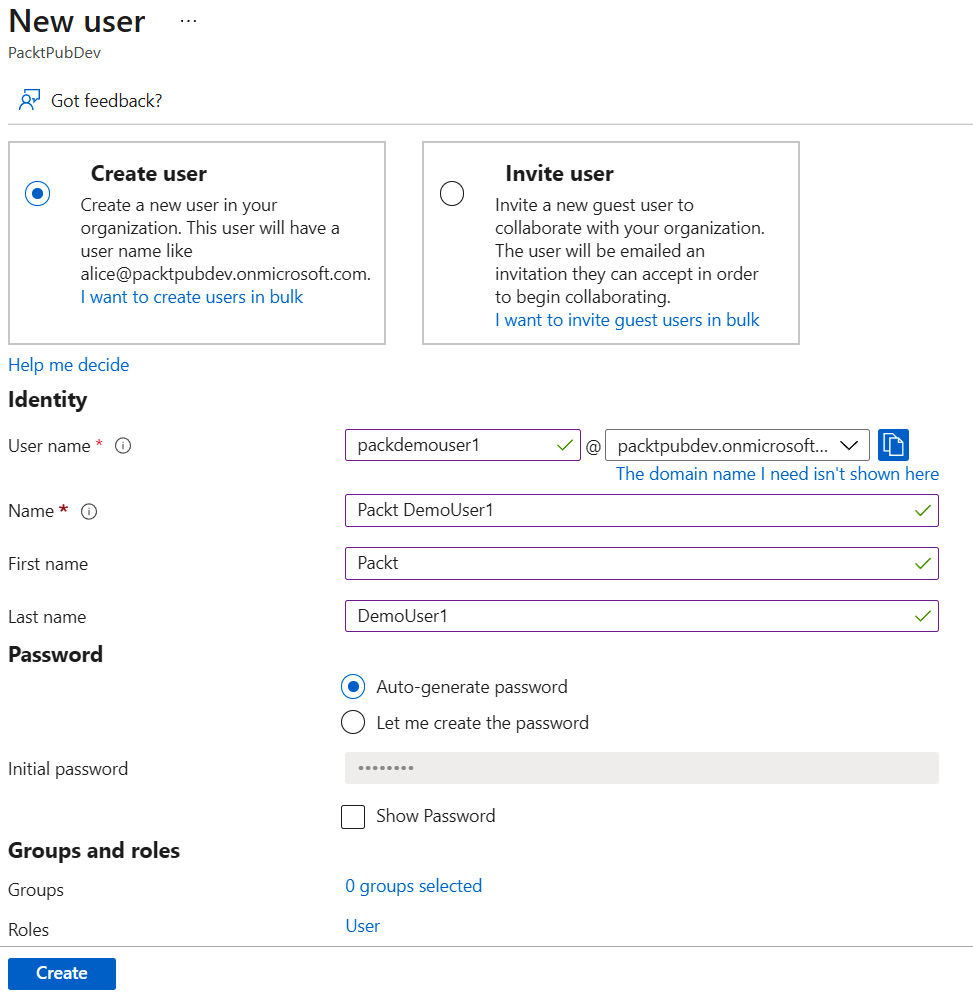
Figure 1.9 – Specifying the user values

Figure 1.9 – Specifying the user values

  1. Click Create.

We have now created a new user in our Azure AD tenant. In the next section, we are going to cover how you can delete the Azure AD tenant when it is not needed anymore.

You have been reading a chapter from
Azure Active Directory for Secure Application Development
Published in: May 2022
Publisher: Packt
ISBN-13: 9781838646509
Register for a free Packt account to unlock a world of extra content!
A free Packt account unlocks extra newsletters, articles, discounted offers, and much more. Start advancing your knowledge today.
Unlock this book and the full library FREE for 7 days
Get unlimited access to 7000+ expert-authored eBooks and videos courses covering every tech area you can think of
Renews at $19.99/month. Cancel anytime