Installing Solarium
Solarium can be downloaded and used directly or it can be installed using a package manager for PHP called Composer. If we download the Solarium library directly, we will have to get other dependencies for installation. Composer, on the other hand, manages all dependencies by itself. Let us have a quick look at installing Composer on both Windows and Linux environments.
For Linux, the following commands will help in installation of Composer:
curl https://getcomposer.org/installer | php
mv composer.phar composer
These command downloads the Composer installer PHP script and passes the output to the PHP program for interpretation and execution. During execution, the PHP script downloads the Composer code into a single executable PHP program composer.phar (PHP Archive). We are renaming the composer.phar executable to Composer for ease of use purposes. On Linux, Composer can be installed at a user level or at a global level. To install Composer at user level, simply add it to your environment path using the following command:
export PATH=<path to composer>:$PATH
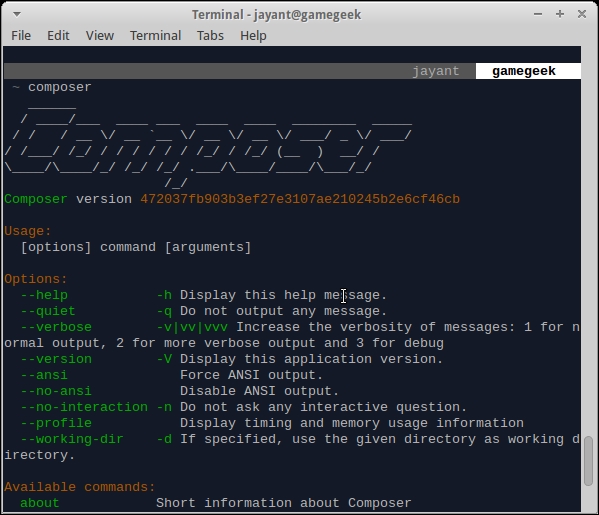
To install Composer on a global level simply move it to the system path suchas /usr/bin or /usr/local/bin. To check if Composer has been installed successfully, simply run Composer on your console and check the various options provided by Composer.

Windows user can download composer-setup.exe from the following link:
http://getcomposer.org/Composer-Setup.exe
Double-click on the executable and follow instructions to install Composer.
Note
We will need to install a web server—mostly Apache and configure it to enable the execution of PHP scripts on it.
Alternatively, we can use the built-in web server in PHP 5.4. This server can be started by going to the directory where all HTML and PHP files are and by using the php –S localhost:8000 command to start the PHP development server on port 8000 on our local machine.
Once Composer is in place, installing Solarium is pretty easy. Let us install Solarium on both Linux and Windows machine.
For Linux machines, open the console and navigate to the Apache documentRoot folder. This is the folder where all our PHP code and web applications will reside. In most cases, it is /var/www or it can be changed to any folder by changing the configuration of the web server. Create a separate folder where you want your applications to reside and also create a composer.json file inside this folder specifying the version of Solarium that needs to be installed.
{
  "require": {
    "solarium/solarium": "3.1.0"
  }
}
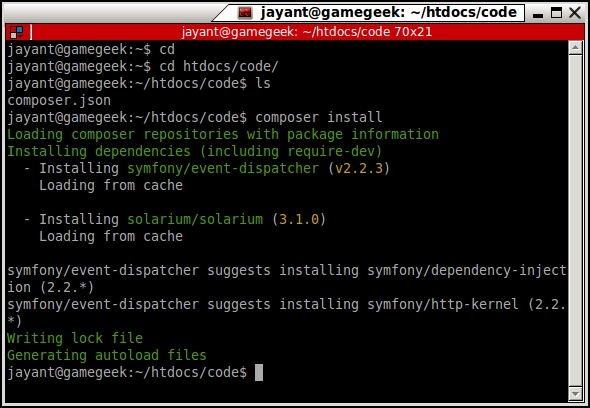
Now install Solarium by running the composer install command. Composer automatically downloads and installs Solarium and its related dependencies such as symfony event dispatcher. This can be seen in the output of Composer.

For installation on Windows, open up your command prompt and navigate to the Apache documentRoot folder. Create a new folder inside documentRoot and run composer install inside the folder.
We can see that during installation, symfony event dispatcher and solarium library are downloaded in a separate folder named vendor. Let us check the contents of the vendor folder. It consists of a file called autoload.php and three folders namely composer, symfony, and solarium. The autoload.php file contains the code to load Solarium library in our PHP code. Other folders are self explanatory. The solarium folders is the library and the symfony folder contains a dependency known as event dispatcher, which is being used by Solarium. The composer folder contains files which help in loading all the required libraries in PHP.


