Setting up a studio scene
In this first recipe, we are going to create a basic scene that we'll be able to use as our background level throughout this course. This initial step is here just so we can go over the basics of the engine and get familiar with different useful websites from where we can download multiple assets.
Getting ready
Before we actually start creating our basic studio scene, we will need to download Unreal Engine 4. I've started writing this book with version 4.20.3, but don't hesitate to use the latest version at the time of reading.
Here's how you can download it:
- Get the Epic Games Launcher from the engine's website, https://www.unrealengine.com/en-US/blog, and follow the installation procedure indicated there.
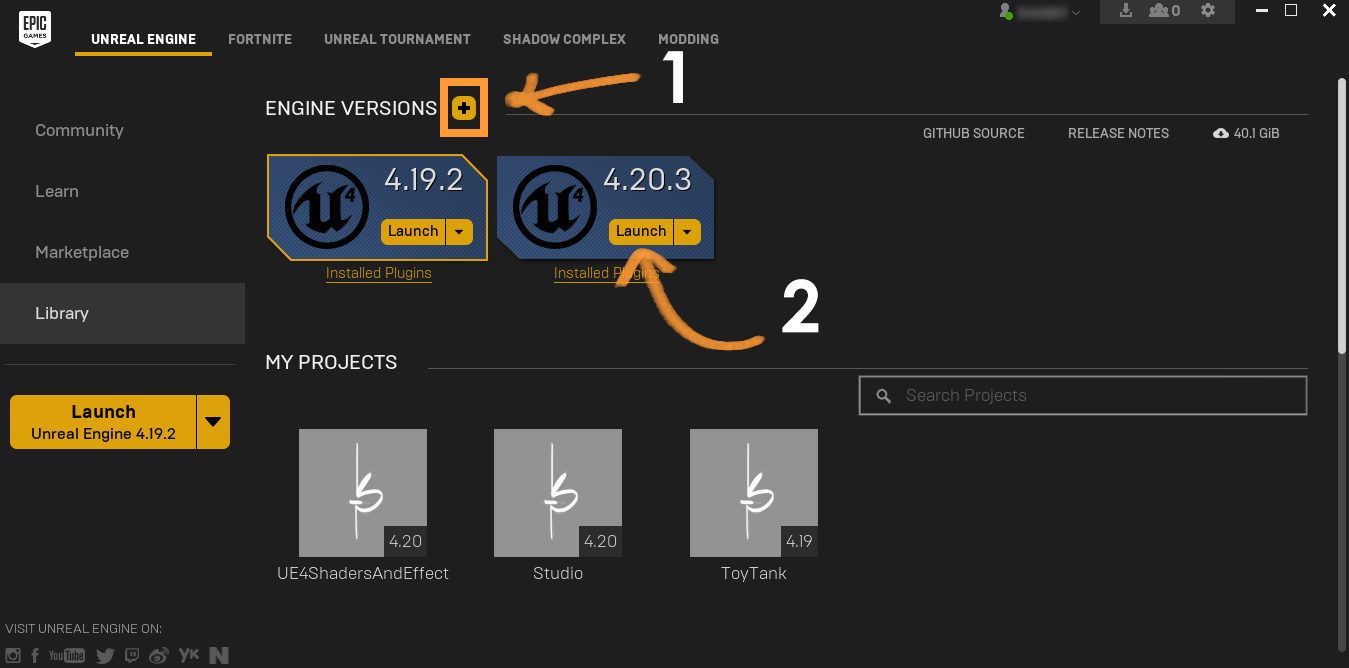
- Once installed, download the latest version of the engine. We can do so by navigating to the
UNREAL ENGINEsection of the launcher, in the tab namedLibrary. In there, we'll be able to see a+icon (1), which lets us download whichever version of Unreal we want. Once we've downloaded it, launch it (2) so we can get started:
And that's all you need! We now have everything required to get started in Unreal Engine 4. How cool is that? A whole new game engine at our fingertips, completely free, and with a variety of tools within it that would take years to learn and master. It really is a thing of wonder! Next up, we are going to start learning about one of those tools—the materials. And in order to do so, let's start by creating our first project!
How to do it...
Let's start by launching the engine that we have just installed and creating a new project by taking the following steps:
- Create a
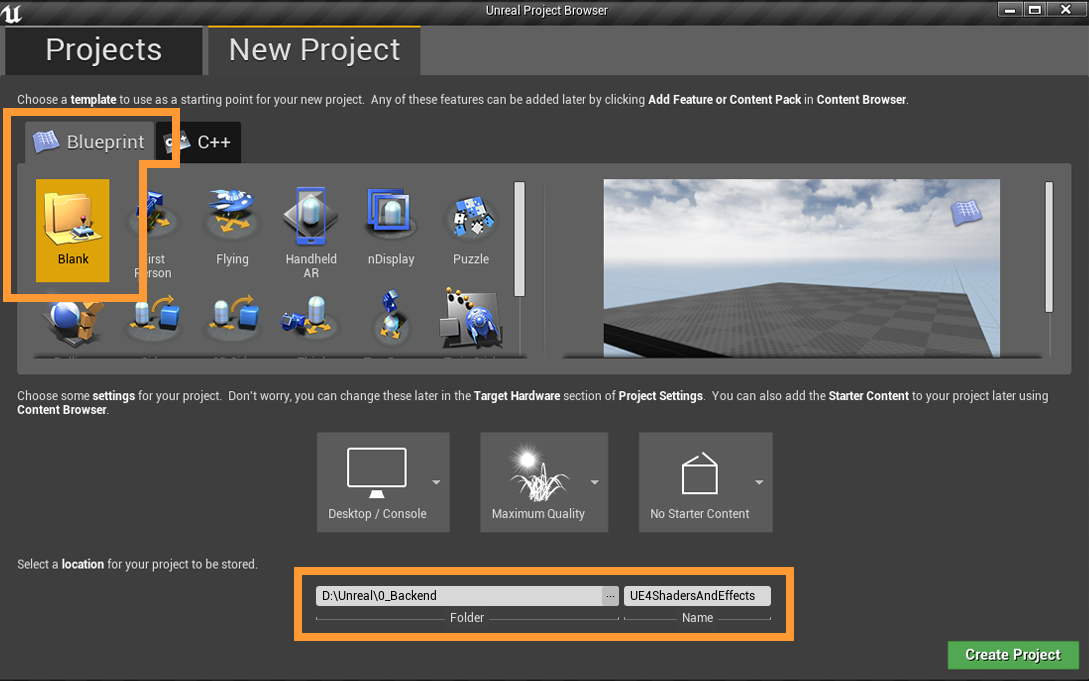
New Project—give it a name and select the folder where you want it to live. Just as a reference, as shown in the following screenshot, I've decided to start off with a blank blueprint-based project, but it doesn't really matter what we decide to initially include. Nothing special so far! You can choose to add theStarter Contentif you want, as it comes with several useful resources that we can use later on:
Note
Additionally, you can get more free resources from other different places. You can check the Learn tab within the Epic Games Launcher to see what freely available examples you can get a hold of, or check the community section to see if there is any new cool content.
Epic has recently collaborated with multiple content creators to make a multitude of different assets available to anyone using Unreal, and you can check them out at the following website: https://www.unrealengine.com/en-US/blog/new-free-content-coming-to-the-unreal-engine-marketplace?utm_source=launcher&utm_medium=chromium&utm_term=forum&utm_content=FreeContent&utm_campaign=communitytab.
- The first thing that we need to do once the editor loads is to go to
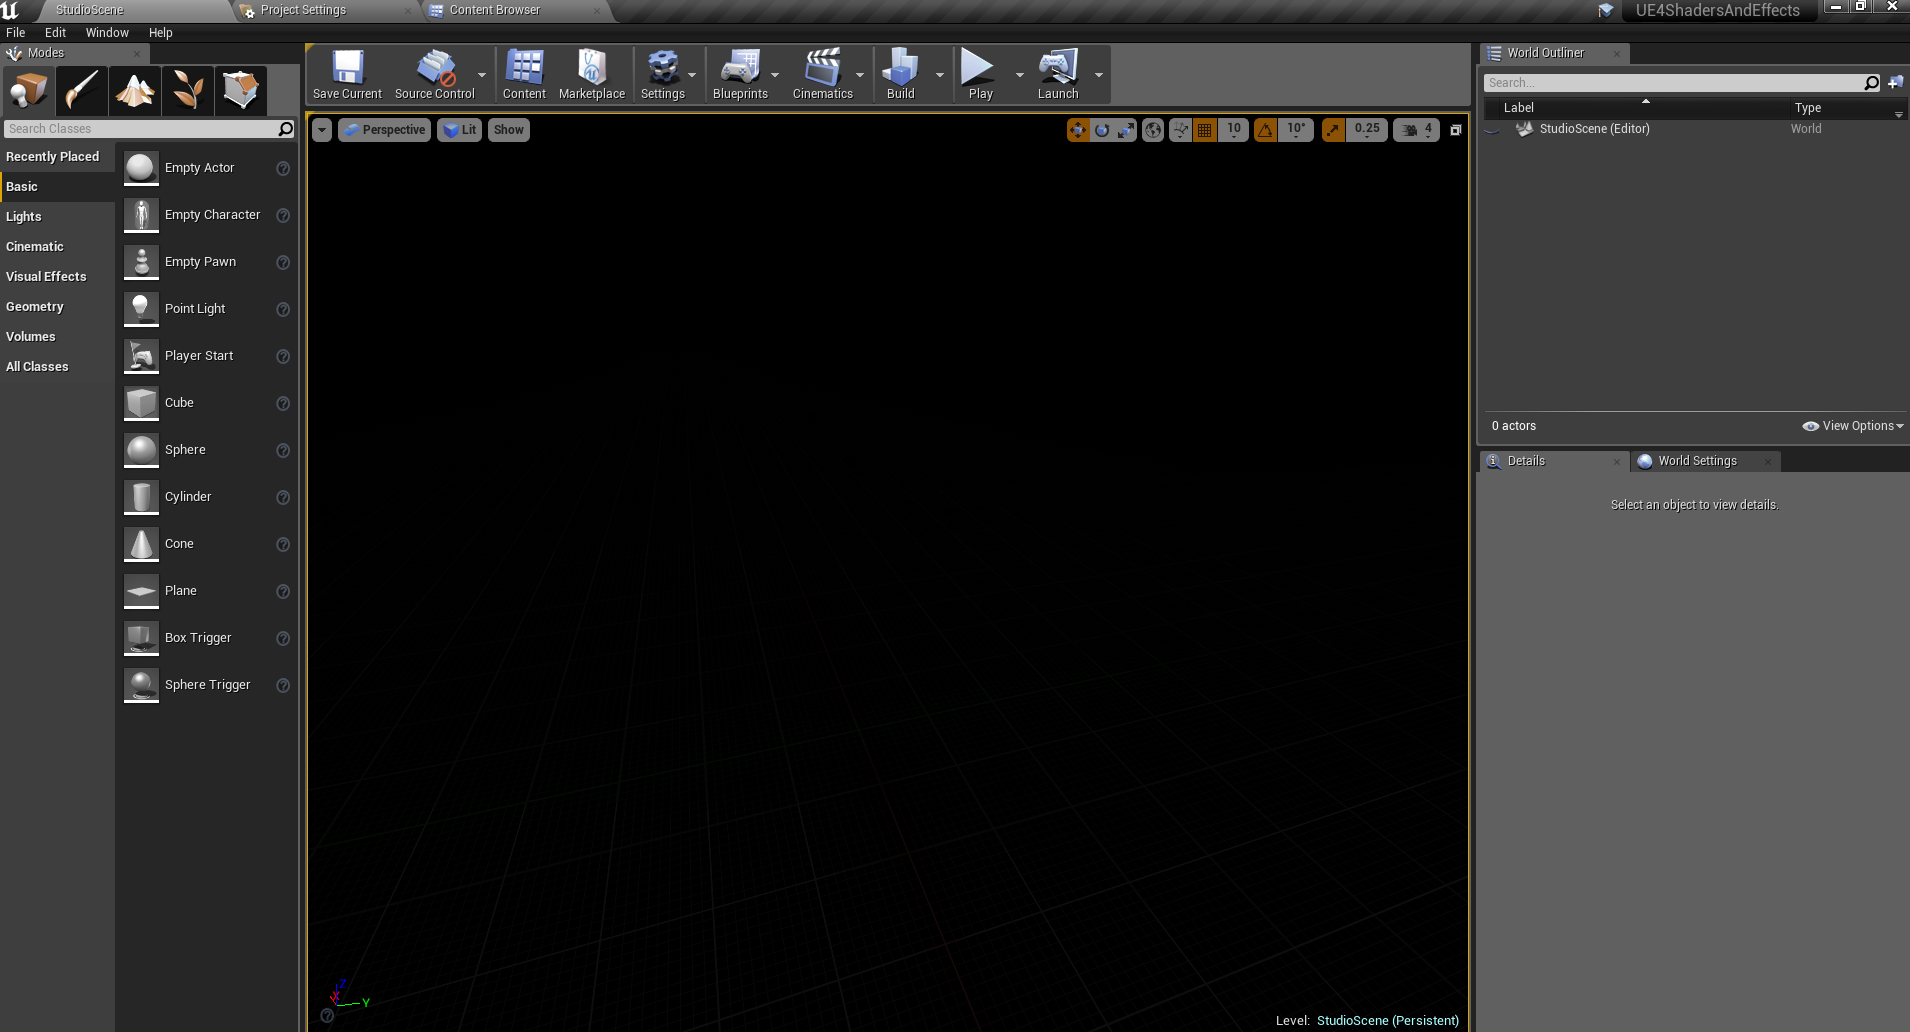
File|Save Current As, just to make sure that the changes we are about to implement get saved. Otherwise, we would just be working on the default untitled map, which wouldn't store any of the changes that we are about to make! - Once that's done, we are now ready to start spicing things up. Erase everything from the world outliner—we are not going to be using any of that for our studio scene. Your scene and the world outliner should look something like this:
- If you haven't done so before, it is now time to include the
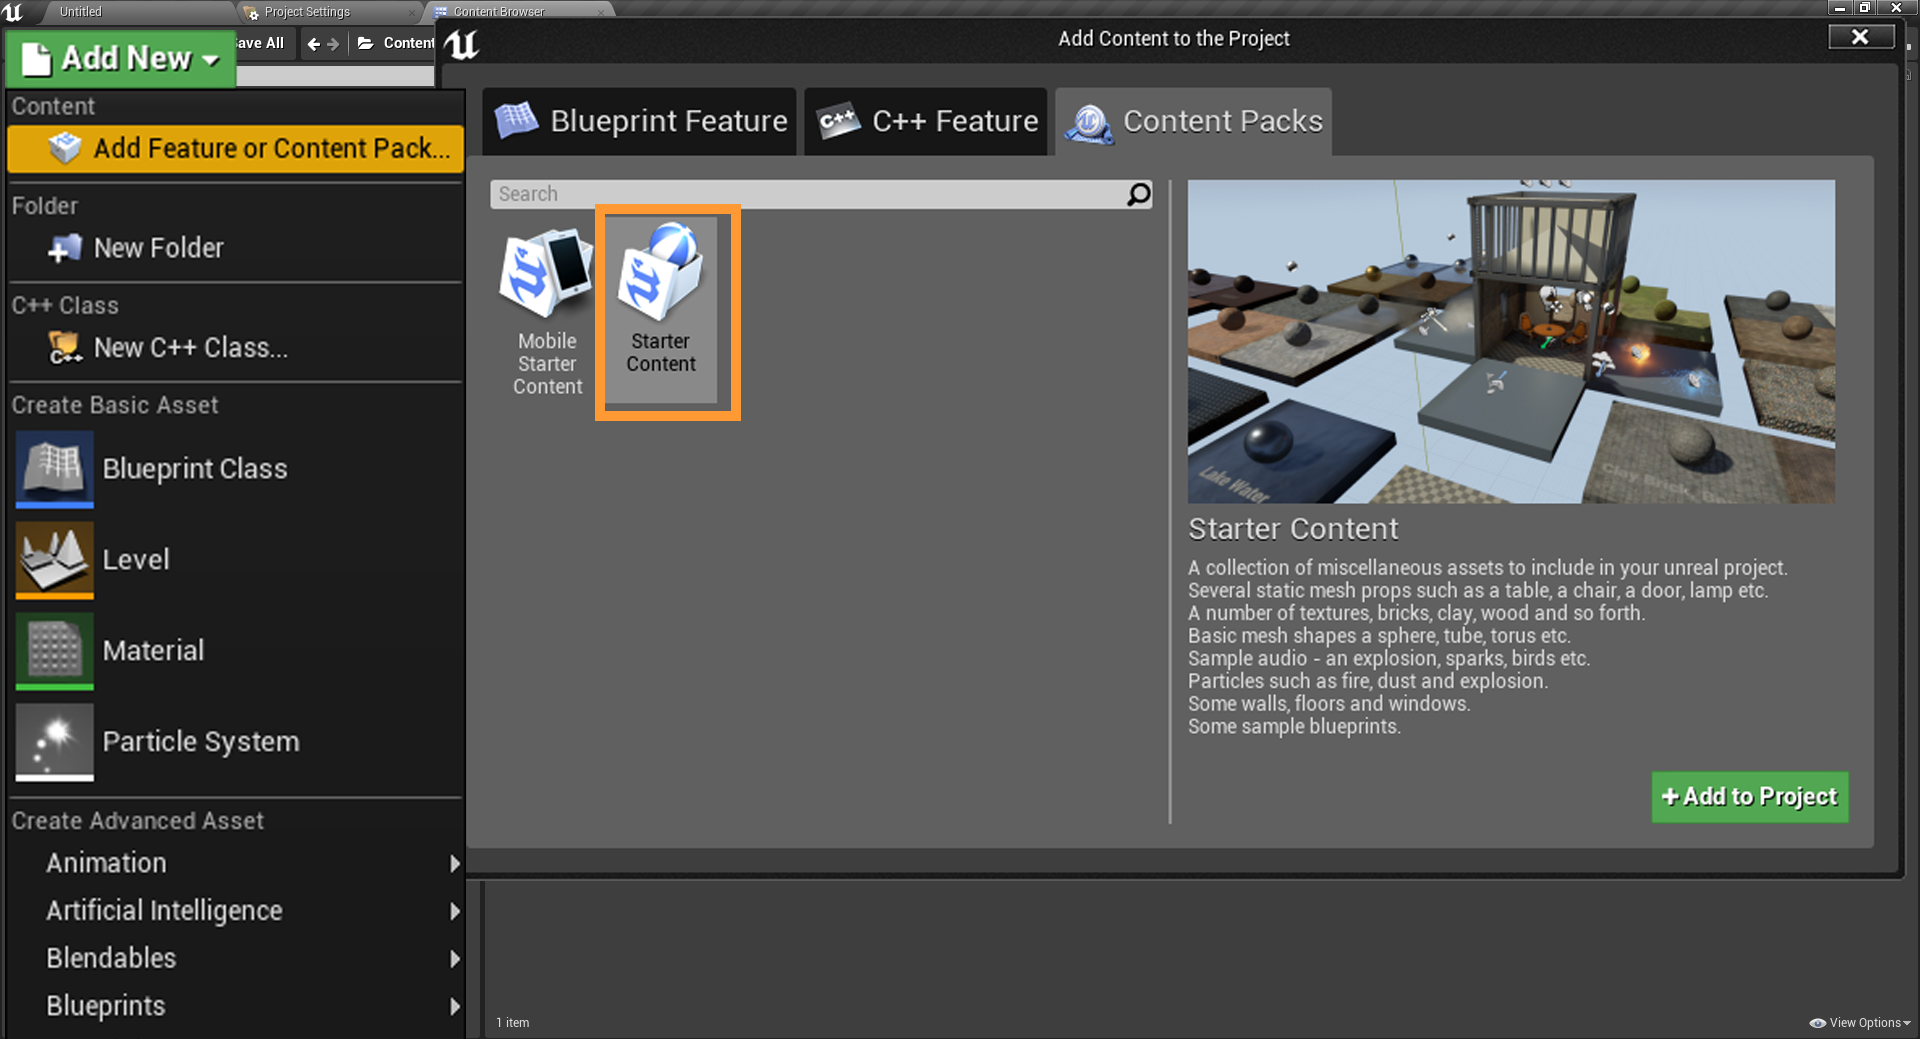
Starter Content. Don't worry if you didn't do it at first! I didn't say it was mandatory only to be able to look at how to include it after starting a new project—just navigate to the content browser and look for theAdd Newoption in the upper left corner. Select the first available option in there, namedAdd featureor Content Pack,
- With that included, we can see that the Starter Content includes a blueprint that can be quite useful for setting up the lighting in our scene. You can look for this inside of the
Content Browser|Starter Content|Blueprintsfolder, and it's namedBP_ Light Studio. Select it and drag it into the scene we have previously created.
The asset called BP_Light Studio is a blueprint that Epic Games has already created for us. It includes several lighting settings that will make our lives easier—instead of having to set up multiple lights and assign them different values, it automates all of that work for us so we just have to choose how we want our scene to look. Making a simple studio scene will be something very easy to do this way.
Retaining that level of control over which lights are placed and how we do that is, of course, very important, and something that we'll do later in the book, but for now this is a very powerful tool that we will use.
- With the
BP_ Light Studioplaced in our scene, we can start tweaking its default values just so we can use it as a lighting studio setup. Select the blueprint from the world outliner and let's tweak several settings. - The first one we can look at is the
HDRitab inside the details panel for theBP_ Light Studio. HDRi is short for High Dynamic Range imaging, which is a type of texture that stores the lighting information from the place at which the photo was taken. Using that data as a type of light in 3D scenes is a very powerful technique, which makes our environments look more natural and real:
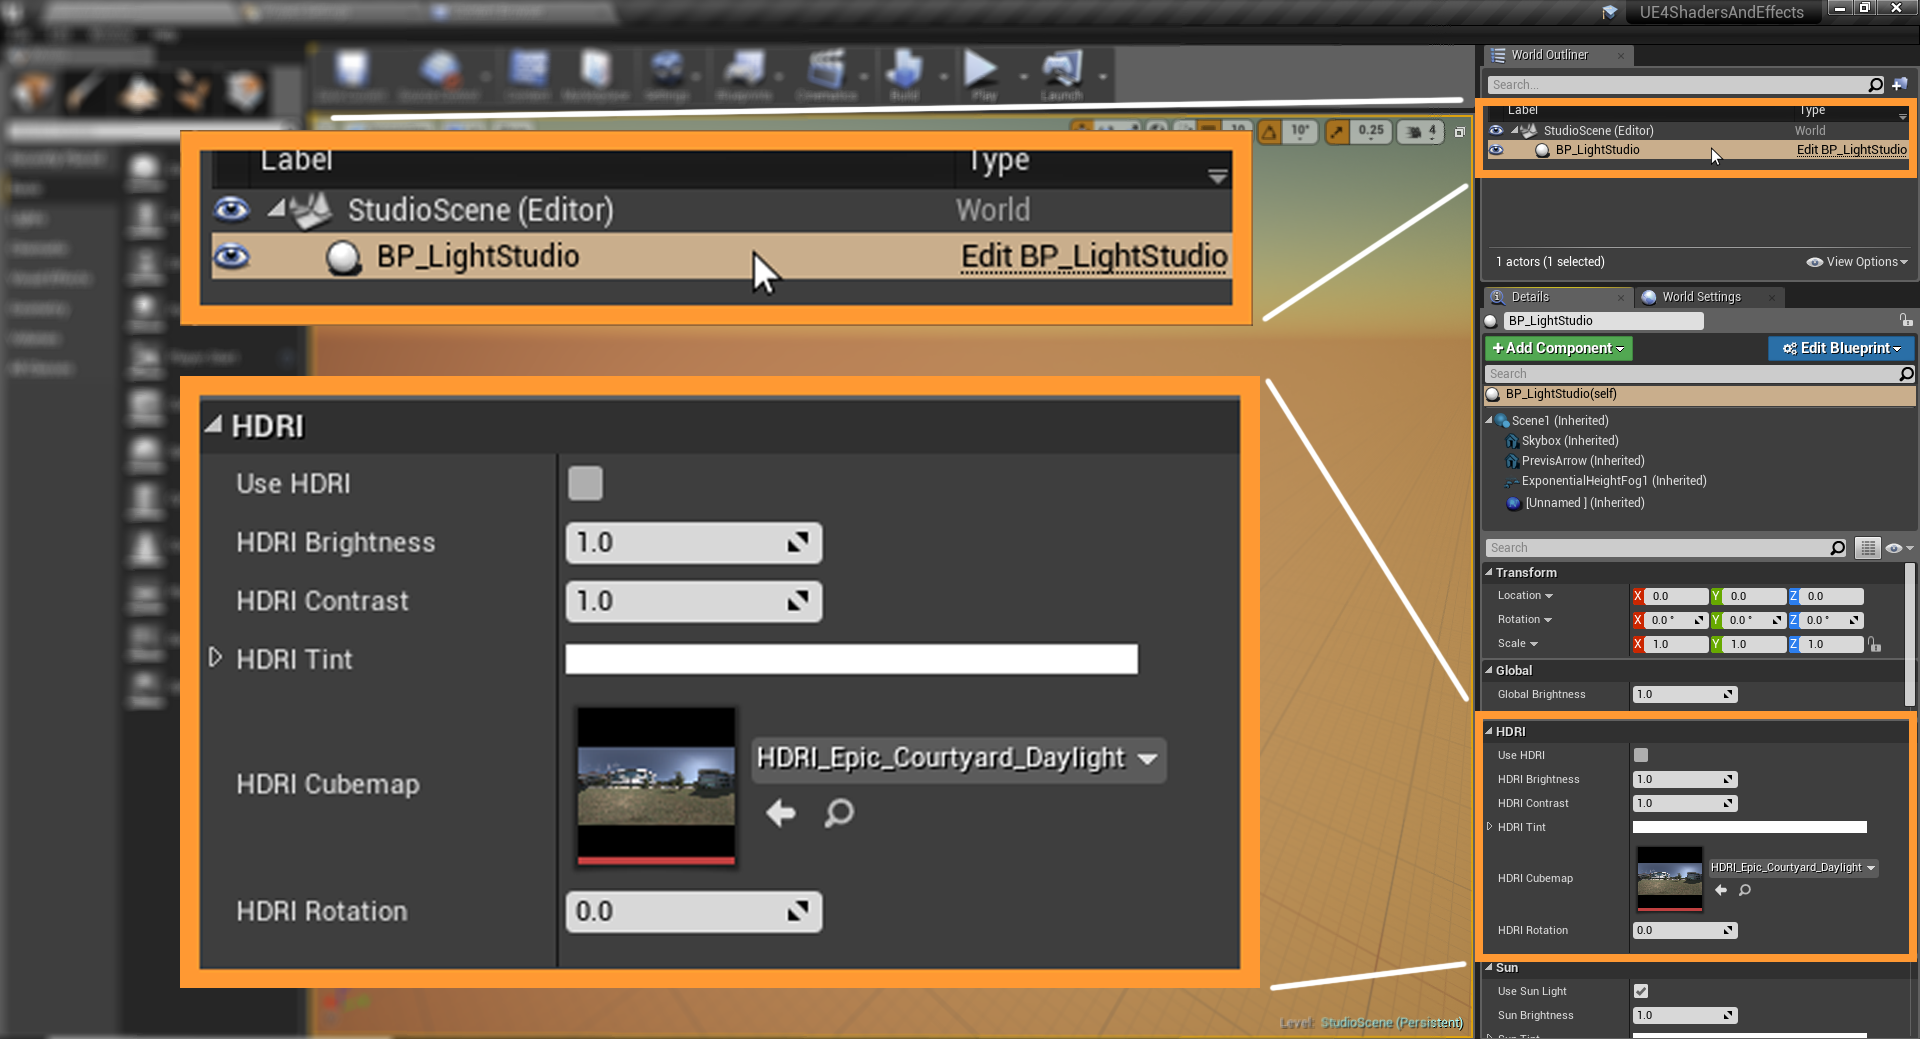
- However, useful HDRi might be, this lighting method is turned off by default, so make sure to tick the
Use HDRicheckbox. That will make the texture placed in theHDRi Cubemapslot light the scene. Feel free to use any other ones you might have or download one to use throughout the project!
HDRi images are very useful for 3D artists, even though they can be tricky to create as it is usually a lengthy process. There are many websites from which you can buy them, but I like the following one that gives you free access to some very useful ones: http://www.hdrlabs.com/sibl/archive.html.
We will be using the one called Alexs Apartment, which is quite useful for interior visualization.
- You can now untick the
Use Light Sunand theUse Atmosphereoption found under theSunand theAtmospheresection of theBP_LightStudioblueprint if you use an HDRi image. As we said earlier, this type of picture stores lighting information, which renders the use of other lights sometimes optional. - Once you've done that, let's create a basic plane on which we can use to lay out our objects. Dragging a plane into the scene from the
Modespanel will do the job:Modes|Basic category|Plane. - Let's assign our newly placed plane an interesting default material so we have something to look at—with the plane selected, scroll down to the
Materialssection of the details panel and change its default value toM_Wood_Pine. Said material is part of theStarter Content, so make sure you have it installed!
We should now be looking at something like the following:
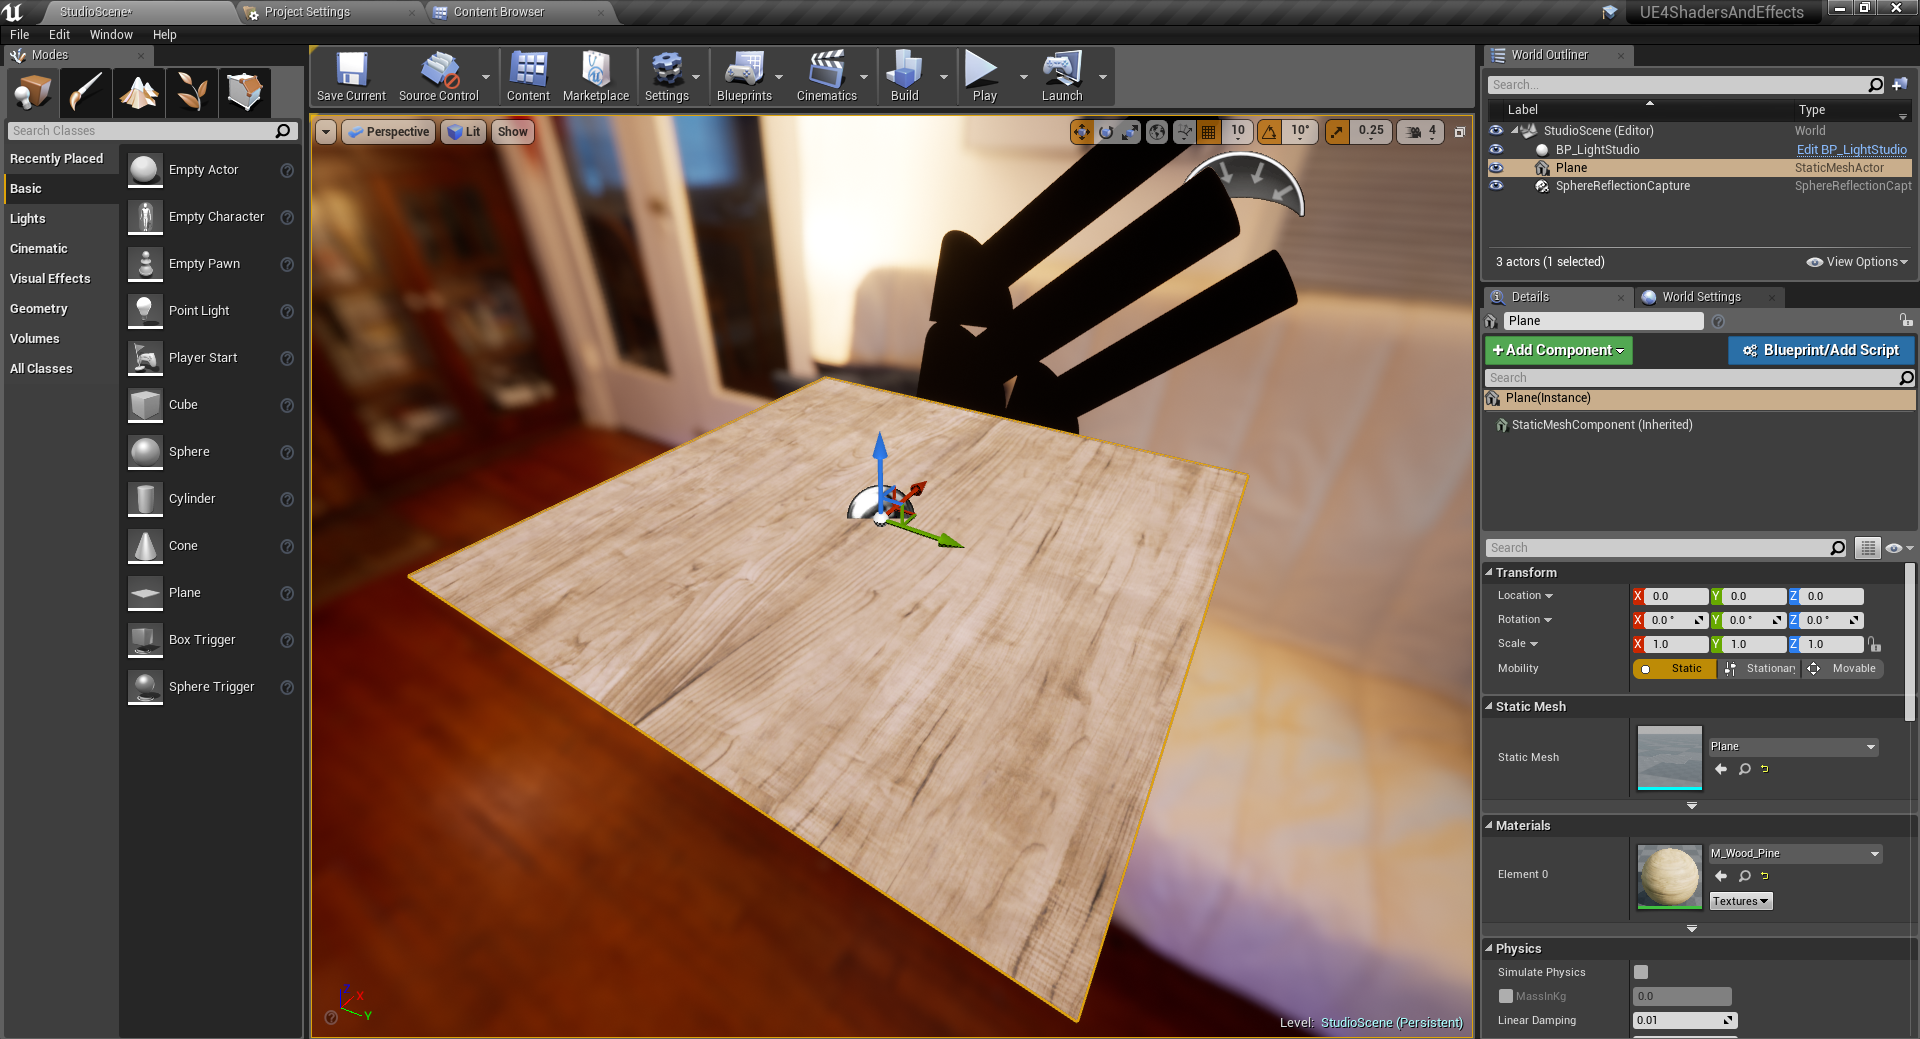
With that out of the way, we can say that we've finished creating our basic studio scene. Having done that will enable us to use this level for visualization purposes, kind of like having a white canvas on which to paint. We will use this to place other models and materials as we create them, in order to correctly visualize our assets.
How it works...
There are at least two different objectives that we can complete if we follow the previous set of steps—the creation of our intro scene being the first one and the second one being getting familiar with the engine. This final task is something that will continue to happen over time—but getting our hands dirty now will have hopefully accelerated that process.
Something that could also speed that up even more is a review process of what we've just done. Not only will we learn things potentially faster, but knowing why we do the things the way we do them will help us cement the knowledge we acquire—so expect to see a How it works... section after each recipe we tackle! As the first ever example of the aforementioned section, we'll briefly go over what we have just done before in order to understand how things work in Unreal.
The first step we've taken was to actually create the Unreal Engine project on which we'll be working throughout this book. We've then added the assets present in the Starter Content package that Epic Games supplies, as it contains useful 3D models and materials that we can check later on as we work on other recipes. The most important bit we've done was probably the lighting setup though, as this will be the basis of some of the next recipes. This is because having a light source is vital to visualizing the different assets that we create or add to the scene. Lighting is something that we'll explore more in some of the next recipes, but the method we've chosen in this one is a very cool technique that you can use in your own projects. We are using an asset that Unreal calls a blueprint, something that allows you to use the engine's visual scripting language to create different functionalities within the game engine without using C++ code. This is extremely useful, as you can program different behaviors across multiple types of actors to use to your advantage—turning a light on and off, opening a door, creating triggers to fire certain events, and so on. We'll explore them more as we go along, but at the moment we are just using an already available one to specify the lighting effects we want to have in our scene. This is in itself a good example of what a blueprint can do, as it allows us to set up multiple different components without having to specify each one of them individually—such as the HDRi image, the sun position, and others that you can see if you look at the Details panel.


