Search icon CANCEL
Subscription
0
Cart icon
Your Cart (0 item)
Close icon
You have no products in your basket yet
Arrow left icon
Explore Products
Best Sellers
New Releases
Books
Videos
Audiobooks
Learning Hub
Conferences
Free Learning
Arrow right icon
Arrow up icon
GO TO TOP
Practical Business Intelligence

You're reading from   Practical Business Intelligence Optimize Business Intelligence for Efficient Data Analysis

Arrow left icon
Product type Paperback
Published in Dec 2016
Publisher Packt
ISBN-13 9781785885433
Length 352 pages
Edition 1st Edition
Languages
Arrow right icon
Author (1):
Arrow left icon
Ahmed Sherif Ahmed Sherif
Author Profile Icon Ahmed Sherif
Ahmed Sherif
Arrow right icon
View More author details
Toc

Table of Contents (16) Chapters Close

Practical Business Intelligence
Credits
About the Author
About the Reviewer
www.PacktPub.com
Customer Feedback
Preface
1. Introduction to Practical Business Intelligence FREE CHAPTER 2. Web Scraping 3. Analysis with Excel and Creating Interactive Maps and Charts with Power BI 4. Creating Bar Charts with D3.js 5. Forecasting with R 6. Creating Histograms and Normal Distribution Plots with Python 7. Creating a Sales Dashboard with Tableau 8. Creating an Inventory Dashboard with QlikSense 9. Data Analysis with Microsoft SQL Server

Configuring an ODBC connection


As with all BI tools, our first task will be connecting to data. This process can be accomplished using an ODBC connection. In order to do so, we need to first configure our 64-bit ODBC connection for our SQL Server instance.

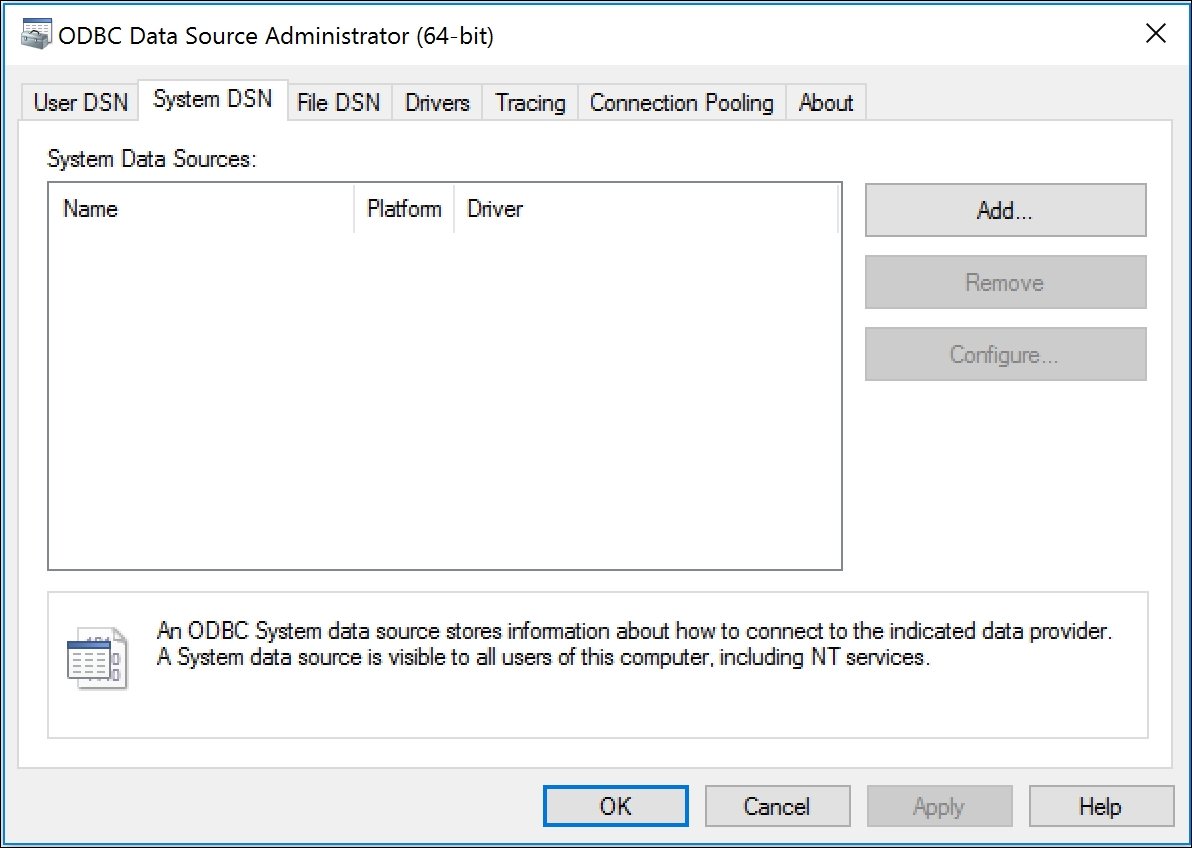
ODBC connections can be found in the following location within a typical Windows environment: C:\ProgramData\Microsoft\Windows\Start Menu\Programs\Administrative Tools.

Once you've clicked on the ODBC 64-bit connection, select the System DSN tab, as seen in the following screenshot:
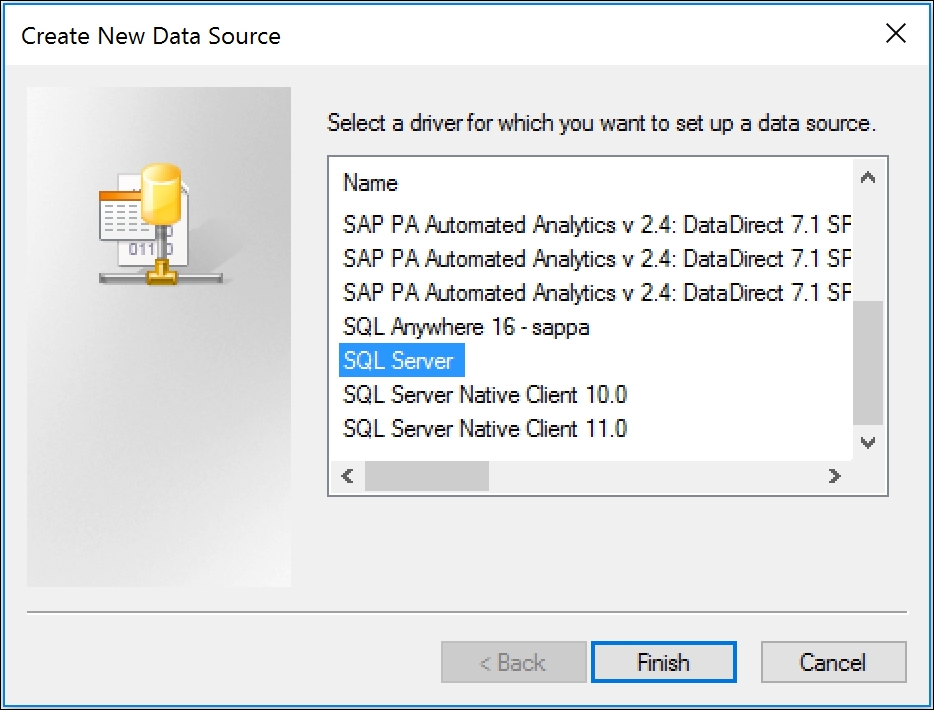
The next step is to create a new connection by clicking on the Add button and then selecting the SQL Server driver, as seen here:
Next we will assign a name to the SQL Server data source. For our purposes, we will name the connection as well as the description as SQLBI, and we will add the server name to complete the configuration process, as seen in the following screenshot:
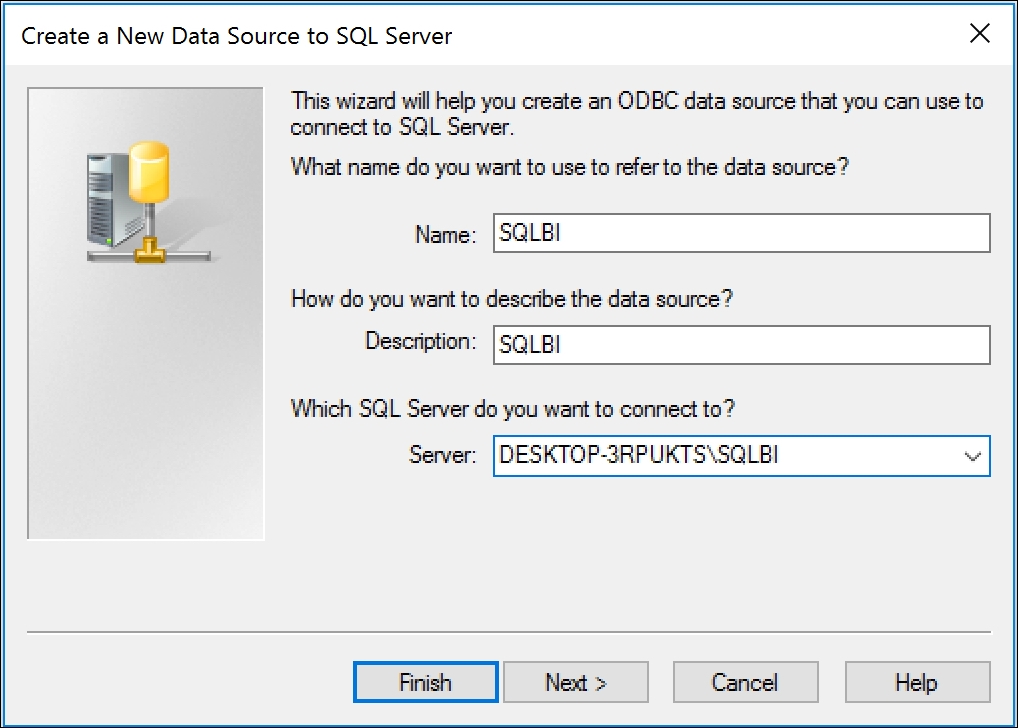
The server name can always be obtained from the login to SQL Server Management Studio...

lock icon The rest of the chapter is locked
Register for a free Packt account to unlock a world of extra content!
A free Packt account unlocks extra newsletters, articles, discounted offers, and much more. Start advancing your knowledge today.
Unlock this book and the full library FREE for 7 days
Get unlimited access to 7000+ expert-authored eBooks and videos courses covering every tech area you can think of
Renews at $19.99/month. Cancel anytime
Banner background image