Search icon CANCEL
Subscription
0
Cart icon
Your Cart (0 item)
Close icon
You have no products in your basket yet
Save more on your purchases! discount-offer-chevron-icon
Savings automatically calculated. No voucher code required.
Arrow left icon
Explore Products
Best Sellers
New Releases
Books
Videos
Audiobooks
Learning Hub
Newsletter Hub
Free Learning
Arrow right icon
timer SALE ENDS IN
0 Days
:
00 Hours
:
00 Minutes
:
00 Seconds
Arrow up icon
GO TO TOP
PhoneGap By Example

You're reading from   PhoneGap By Example Use PhoneGap to apply web development skills and learn variety of cross-platform mobile applications

Arrow left icon
Product type Paperback
Published in Aug 2015
Publisher
ISBN-13 9781785285318
Length 368 pages
Edition 1st Edition
Languages
Arrow right icon
Toc

Table of Contents (12) Chapters Close

Preface 1. Installing and Configuring PhoneGap FREE CHAPTER 2. Setting Up a Project Structure with Sencha Touch 3. Easy Work with Device – Your First PhoneGap Application "Travelly" 4. Integrating the Travelly Application with Custom Service 5. Crazy Bubbles - Your First HTML5 Mobile Game 6. Share Your Crazy Bubbles Game Result on Social Networks 7. Building a Real-time Communication Application – Pumpidu 8. Building "Imaginary" – An Application with Instagram-like Image Filters 9. Testing the PhoneGap Application 10. Releasing and Maintaining the Application Index

Beta release of the iOS application


For the beta release of our application, we will use the TestFlight service from the Apple.

As a developer, we need to be a member of the iOS Developer program. As a tester, we will need to install the application for beta testing and the TestFlight application from the App Store. After that, the tester can leave feedback about the application.

First of all, let's go to https://itunesconnect.apple.com and login there. After that, we can go to the My Apps section and click on the plus sign in the top-left corner. We will get a popup with a request to enter some main information about the application. Let's add the information about our application so that it looks like this:
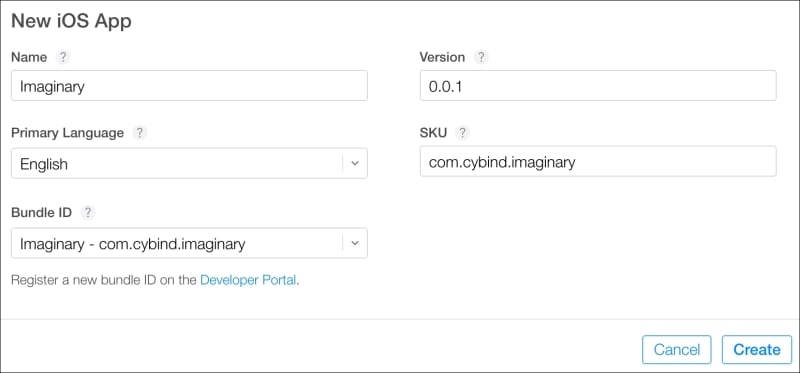
All the fields in the preceding screenshot are well known and do not require additional explanation.

Once we click on the Create button, the application is created, and we can see the Versions tab of the application. Now, we need to build and upload our application. We can do this in two...

lock icon The rest of the chapter is locked
Register for a free Packt account to unlock a world of extra content!
A free Packt account unlocks extra newsletters, articles, discounted offers, and much more. Start advancing your knowledge today.
Unlock this book and the full library FREE for 7 days
Get unlimited access to 7000+ expert-authored eBooks and videos courses covering every tech area you can think of
Renews at $19.99/month. Cancel anytime