Upgrading an APEX Instance
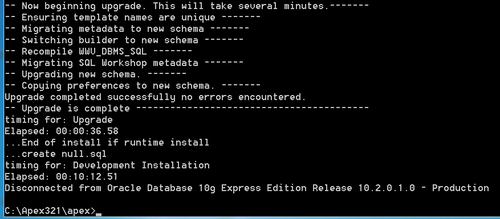
APEX supports direct upgrade from any major old version, starting with HTML DB 1.5 to the newest version. No special measures should be taken for upgrading the Instance. The process starts the same as a new installation, and a new APEX owner schema is created in the case of APEX 3.2.x, it's the APEX_030200 schema. If an older instance of APEX exists on the database, the installation script will detect it, and all the relevant metadata from all the existing applications in the old instance will be copied into the new version instance. If the process was successful, a proper message will be displayed on the screen, similar to the following image:

After completing the post-installation tasks, all the existing applications will be available to you in the new version of the Application Builder.
Note
Backward Compatibility:
APEX fully supports backward compatibility. This means that any application exported file, from any older APEX version, can be imported into your new Instance, and it will be available to you immediately.
Bear in mind:
The APEX upgrade procedure doesn't delete the schema of the old APEX instance. In case of problems in the upgrade process, you can choose to go back to the old version. The reverse procedure is documented in the installation guide, alongside the process of how to clean (completely remove) a faulty installation.
Copy the new images directory
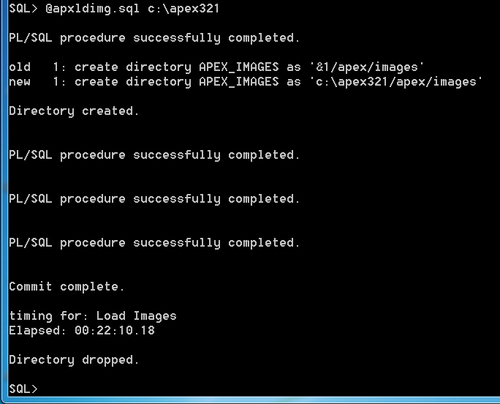
An important part of the upgrade process is to copy the new images directory from the new APEX version distribution file into the location of the images directory. If you are using OHS, we are talking about a simple OS copy operation. If you are using EPG, the APEX distribution file includes a script called apxldimg.sql that will do it for you.

As you can see from the screenshot, the script is quite a silent one, and it doesn't report its progress. Depending on your machine, uploading all the images files can take a while (in the example, it took about 22 minutes), so you should be patient.
Themes and Templates in the Upgrade process
The APEX upgrade process creates a new Themes repository, but it doesn't change any of the Themes and Templates currently assigned to the existing APEX application. That makes all the existing applications immediately available to us in the upgraded version, while still supporting all the changes that we made to their Themes and Templates.
In some cases, however, the new Themes include new features that we would like to use in our application. Past examples include the region Static ID or the Weekly and Daily views in the Calendar templates. In these cases, we should replace the existing Theme with the newer version, and this is a manual process.
First, we need to change the ID of the current application Theme. We can do that through the Themes section of the application Shared Components. On the Themes home page, we should choose the option of Change Identification Number from the Tasks window. In the following screenshot, we can see an example of assigning a new Theme number 118 to the current Theme

Next, we are going to create Theme 18 from the APEX repository. As this repository is part of the APEX upgraded version, the new Theme will be created with all the new features that the new APEX version includes.
From the Themes home page, we should press the Create button, and that will lead us to the Create Theme wizard, which we can see in the following screenshot:

Choosing the option of From the Repository will lead us to the next wizard screen where we'll be able to choose the Theme to create. In our example, we chose to regenerate the built-in Theme 18 with all its new features.
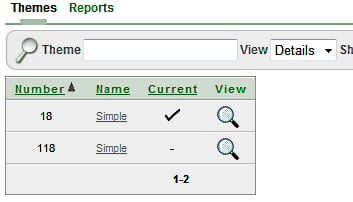
As we can see in the following screenshot, our application includes two Themes now the current 118 Theme and the newly created Theme 18. After making all the necessary changes into the new Theme 18, including utilizing the new features we wanted to use, we can press the Switch Theme button.

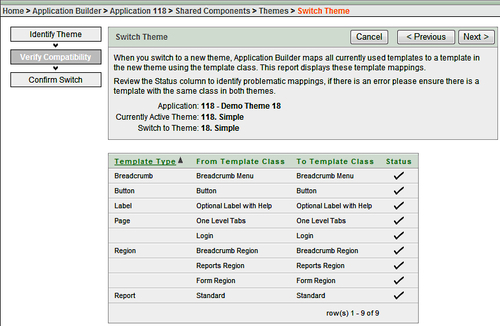
The Switch Theme wizard verifies that the new Theme includes all the Templates that the application uses, as can be seen in the next screenshot:

If everything checks out, the new Theme in our example Theme 18, will take control, and we'll be able to enjoy its new features in our application.


