Search icon CANCEL
Subscription
0
Cart icon
Your Cart (0 item)
Close icon
You have no products in your basket yet
Save more on your purchases! discount-offer-chevron-icon
Savings automatically calculated. No voucher code required.
Arrow left icon
Explore Products
Best Sellers
New Releases
Books
Videos
Audiobooks
Learning Hub
Newsletter Hub
Free Learning
Arrow right icon
timer SALE ENDS IN
0 Days
:
00 Hours
:
00 Minutes
:
00 Seconds
Arrow up icon
GO TO TOP
Low Poly 3D Modeling in Blender

You're reading from   Low Poly 3D Modeling in Blender Kickstart your career as a 3D artist by learning how to create low poly assets and scenes from scratch

Arrow left icon
Product type Paperback
Published in Feb 2024
Publisher Packt
ISBN-13 9781803245478
Length 318 pages
Edition 1st Edition
Tools
Concepts
Arrow right icon
Author (1):
Arrow left icon
Samuel Sullins Samuel Sullins
Author Profile Icon Samuel Sullins
Samuel Sullins
Arrow right icon
View More author details
Toc

Table of Contents (22) Chapters Close

Preface 1. Part 1:Getting Started with Low Poly Modeling
2. Chapter 1: Getting Familiar with Blender FREE CHAPTER 3. Chapter 2: Understanding Low Poly Modeling 4. Chapter 3: Creating a Low Poly Tree 5. Part 2:Modeling and Shading for Low Poly
6. Chapter 4: Exploring Modifiers 7. Chapter 5: Creating Low Poly Mushrooms 8. Chapter 6: Understanding Materials and Shading 9. Part 3:Creating Your Own Assets
10. Chapter 7: Creating a Low Poly Tractor 11. Chapter 8: Low Poly Environment Modeling 12. Chapter 9: Modeling a Kangaroo 13. Chapter 10: Creating Low Poly Houses and Buildings 14. Chapter 11: Using the Asset Browser 15. Part 4:Building a Complete Low Poly Scene
16. Chapter 12: Blocking Out the Scene 17. Chapter 13: Building the Scene 18. Chapter 14: The Big Render 19. Index 20. Other Books You May Enjoy Appendix

Modeling the body

We’ll make our animal starting from a plane. It’s fairly simple.

First, go to the Right view (3) and add a new plane. Press Shift + A and choose Mesh | Plane from the popup.

Now we’ll shape the plane into the rough shape of the animal’s body, head, and tail (not the legs):

  1. Tab into Edit Mode on the plane.
  2. Make sure you’re in Vertex Select mode, so you can adjust individual vertices.
  3. Press A to select everything.
  4. Press R, Y, and 90 to turn it vertical on the Y axis.
  5. Switch to X-Ray by pressing Alt + Z.

Here’s what the plane looks like so far:
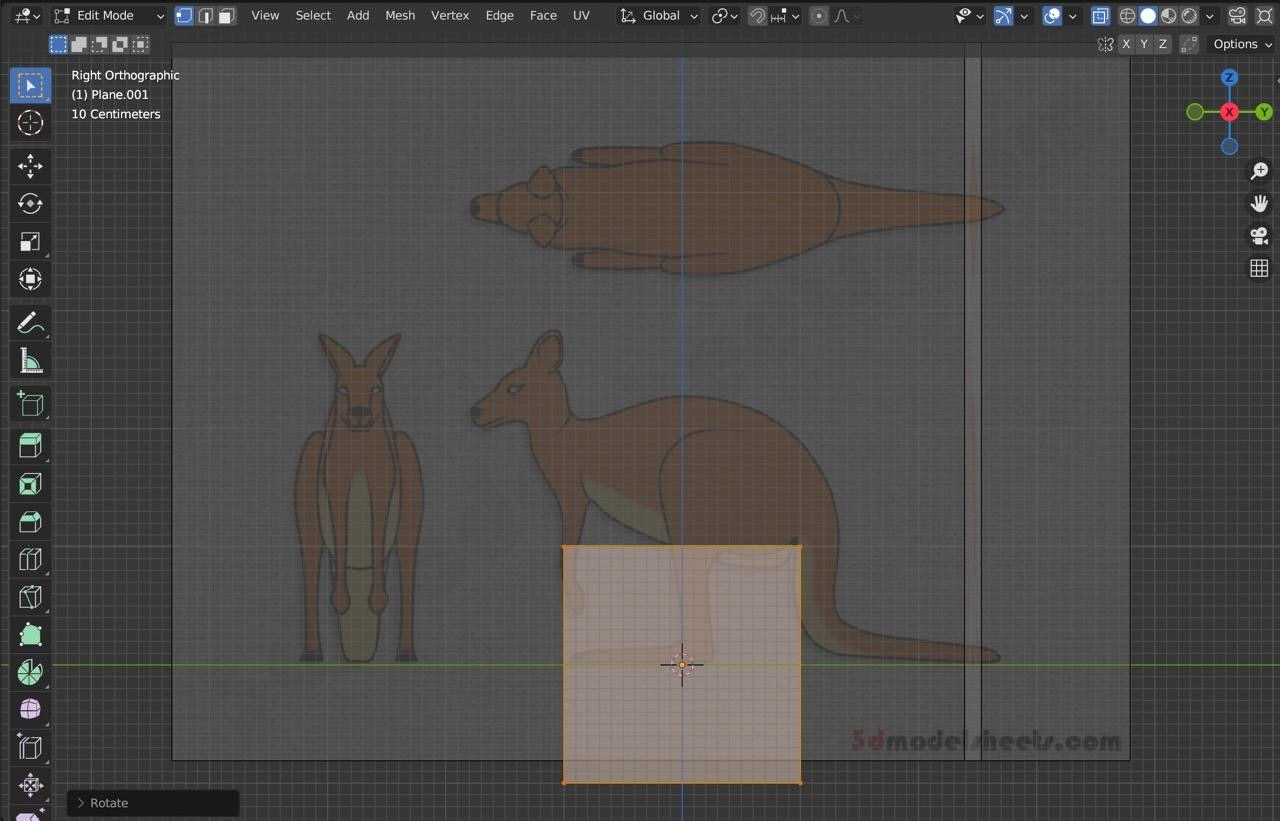
Figure 9.6 – Adding a plane

Figure 9.6 – Adding a plane

6. Now select each vertex, and move them one at a time to position your plane as follows:
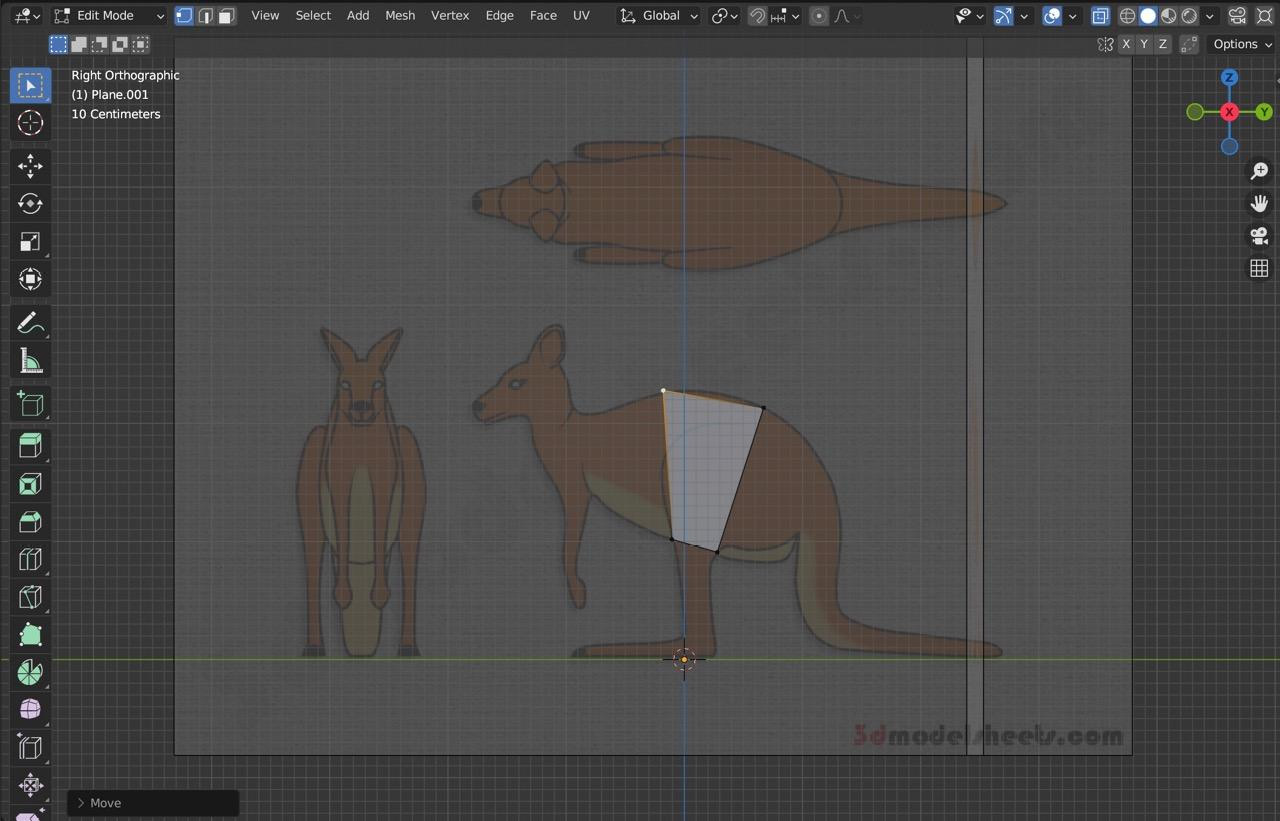
Figure 9.7 – Starting to build the body

Figure 9.7 – Starting to build the body

As you work, you’ll try to follow the shape of the kangaroo’s body. Since you’re going to extrude...

lock icon The rest of the chapter is locked
Register for a free Packt account to unlock a world of extra content!
A free Packt account unlocks extra newsletters, articles, discounted offers, and much more. Start advancing your knowledge today.
Unlock this book and the full library FREE for 7 days
Get unlimited access to 7000+ expert-authored eBooks and videos courses covering every tech area you can think of
Renews at $19.99/month. Cancel anytime
Banner background image