Installing SQL Server 2016
This section will go through the installation of SQL Server engine, which will host the database objects used throughout this book.
These are the features available for SQL Server setup:
- Database engine: It is the core of SQL Server. It manages the various database objects such as tables, views, stored procedures, and so on.
- Analysis services: It allows us to create a data semantic layer that eases data consumption by users.
- Reporting services (native): It allow us to create various reports, paginated, mobile, and KPI's for data consumption.
- Integration services: It is the purpose of this book, SQL Server data movement service.
- Management tools: We'll talk about these in the next section.
- SQL Server Data Tools: We'll talk about these in the next section.
Getting ready
This recipe assumes that you have downloaded SQL Server 2016 Developer Edition and you have installed Oracle JRE.
How to do it...
- The first step is to open the ISO file that you downloaded from the Microsoft Visual Studio Dev Essentials website as described in the SQL Server 2016 download recipe. If you're using Windows 7, you'll need to extract the ISO file into a folder. Third-party file compression utilities such as WinRAR, WinZip, or 7-Zip (and there are many more) can handle ISO file decompression. The setup files will be uncompressed in the folder of your choice. In other versions of Windows such as Windows 8.1, Windows 10, or Windows Server 2012 and beyond, simply double-click on the ISO file that you have downloaded previously and a new drive will appear in Windows Explorer.
- Double-click on the file named
Setup.exeto start the SQL Server installation utility. The features we're going to install are as follows:New SQL Server stand-alone installation or adding features to an existing installation: This will install a local instance (service) of SQL Server on your PCSQL Server Management Tools: The tools used to create, query, and manage SQL Server objectsInstall SQL Server Data Tools: This contains Visual Studio templates to develop and deploy SQL Server databases, integration services packages, analysis service cubes, and reporting services
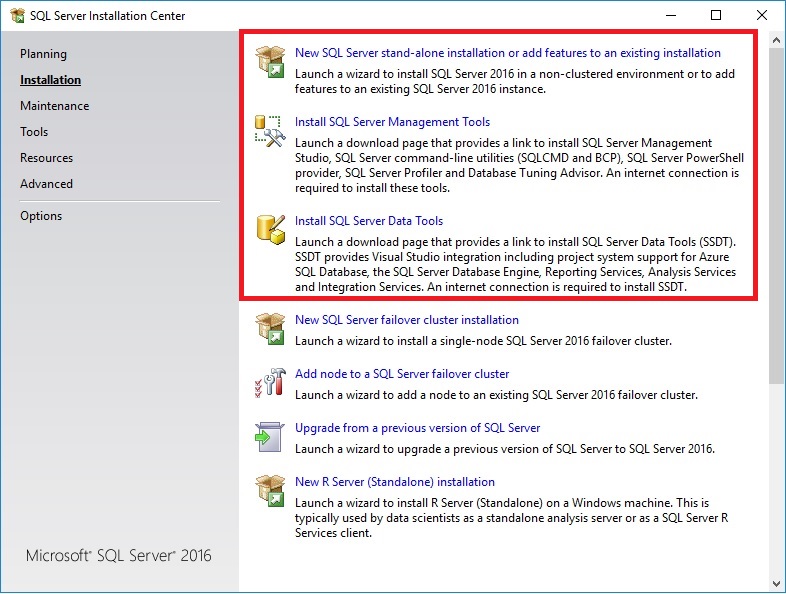
- From the installation utility, select the
New SQL Server stand-alone installation...option as shown in the following screenshot. A new SQL Server setup window opens.
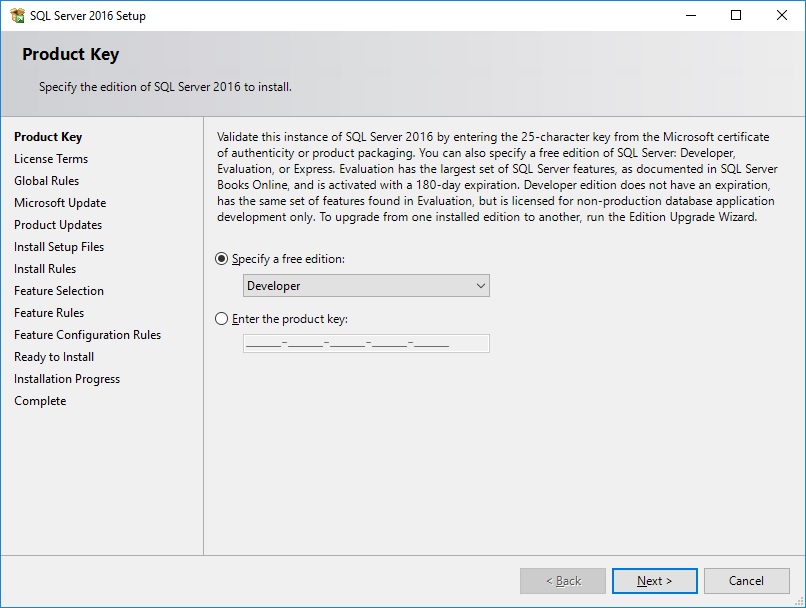
- The
Product Keypage allows us to specify an edition to install. Since we're going to use the free Developer Edition, clickNextto go to the next page, as shown in the following screenshot:
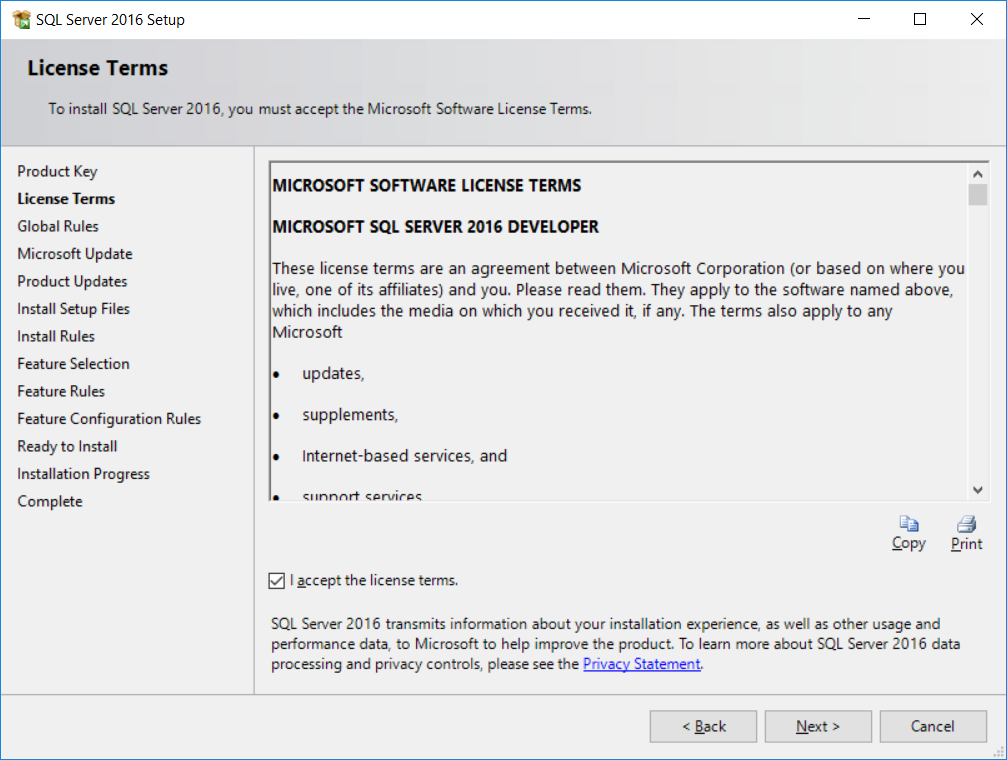
- Accept the license terms and click
Nextto go to the next page, as shown in the following screenshot:
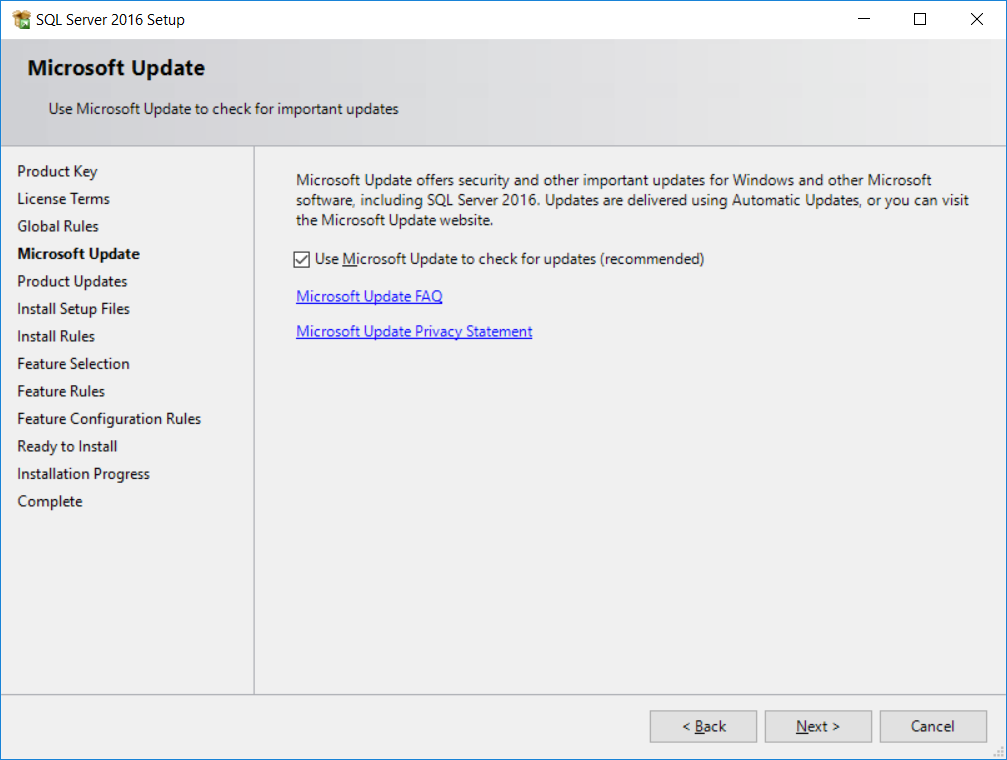
- In this step, the SQL Server setup will check for product updates and will integrate itself into Windows update checks that are done regularly on your machine. This step is not mandatory but it's better to use the latest code. Check
Use Microsoft Update...and clickNext, as shown in the following screenshot:
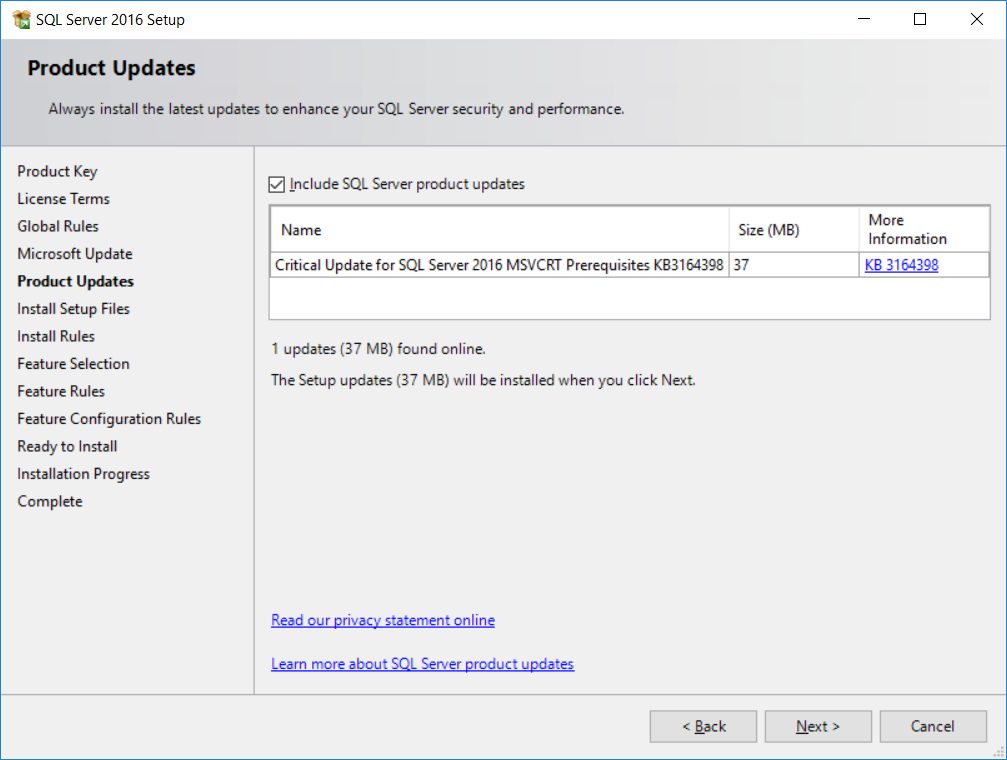
- Some updates might be found during setup. You can get more information on these updates by clicking the link in the
More Informationcolumn. ClickNextto install the updates, as shown in the following screenshot:
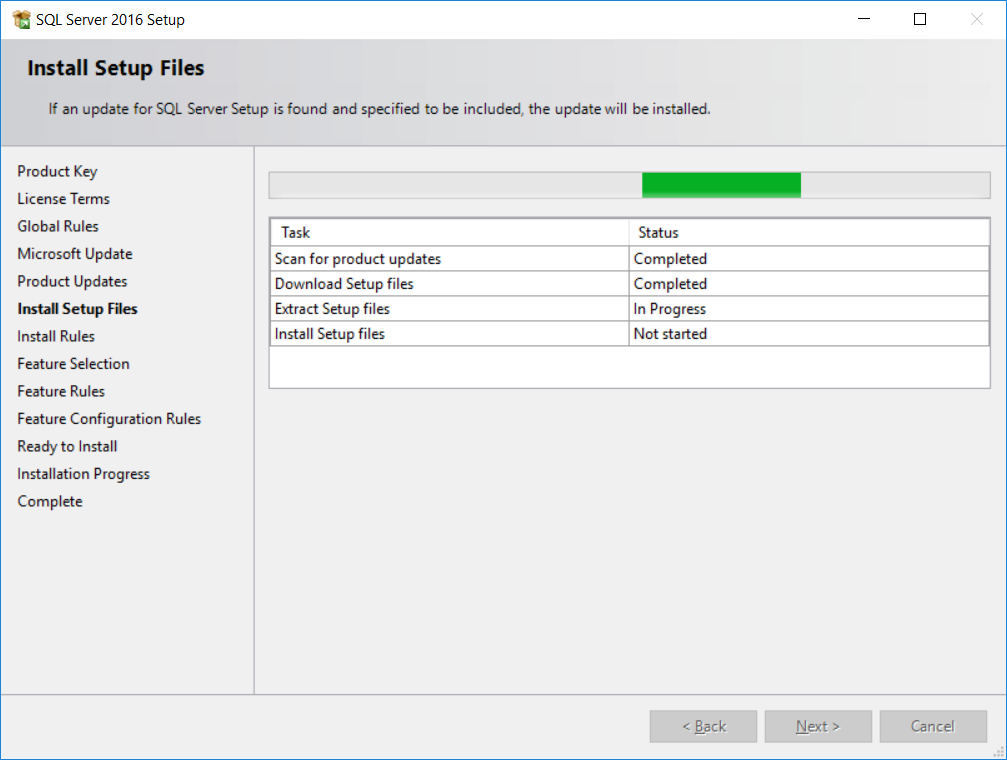
- This step simply checks to make sure that the latest version of SQL Server is installed. Click
Nextonce the setup files are installed, as shown in the following screenshot:
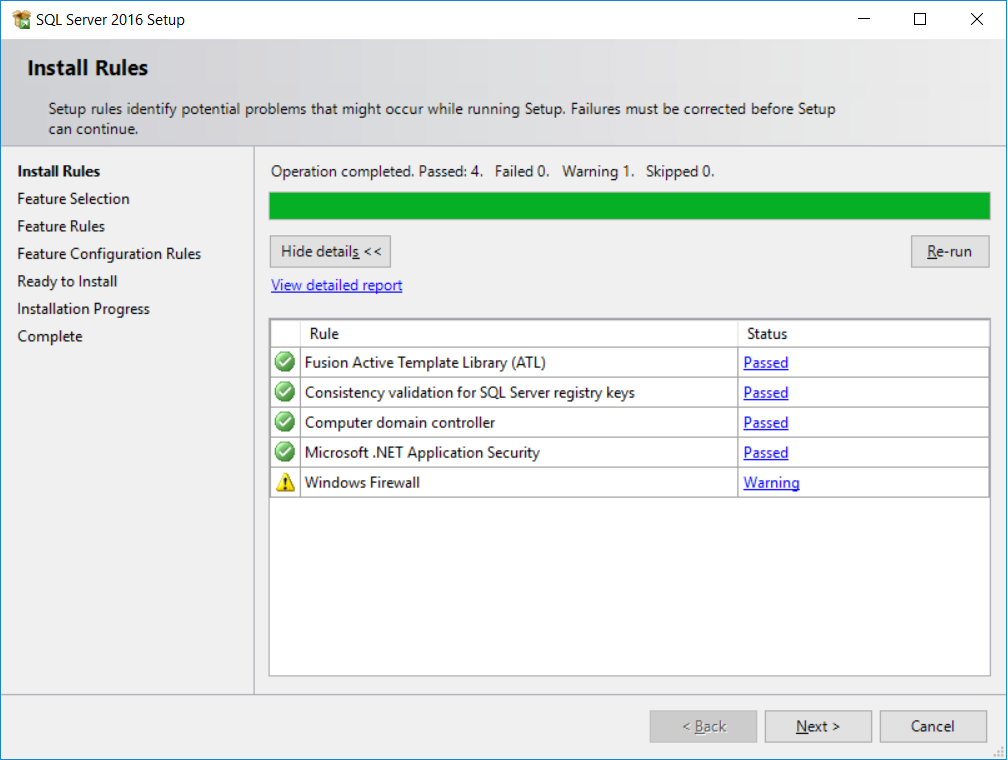
- SQL Server setup will check several rules to ensure that the computer where we want to install it is setup properly. You might get a warning due to Windows firewall rules. This tells you that the port (
1433by default) is not open and SQL Server won't be available from outside your PC. Don't worry about it. Since we'll be using SQL Server from our PC only, we do not need to open any ports for now. ClickNextto advance to the feature selection page, as shown in the following screenshot:
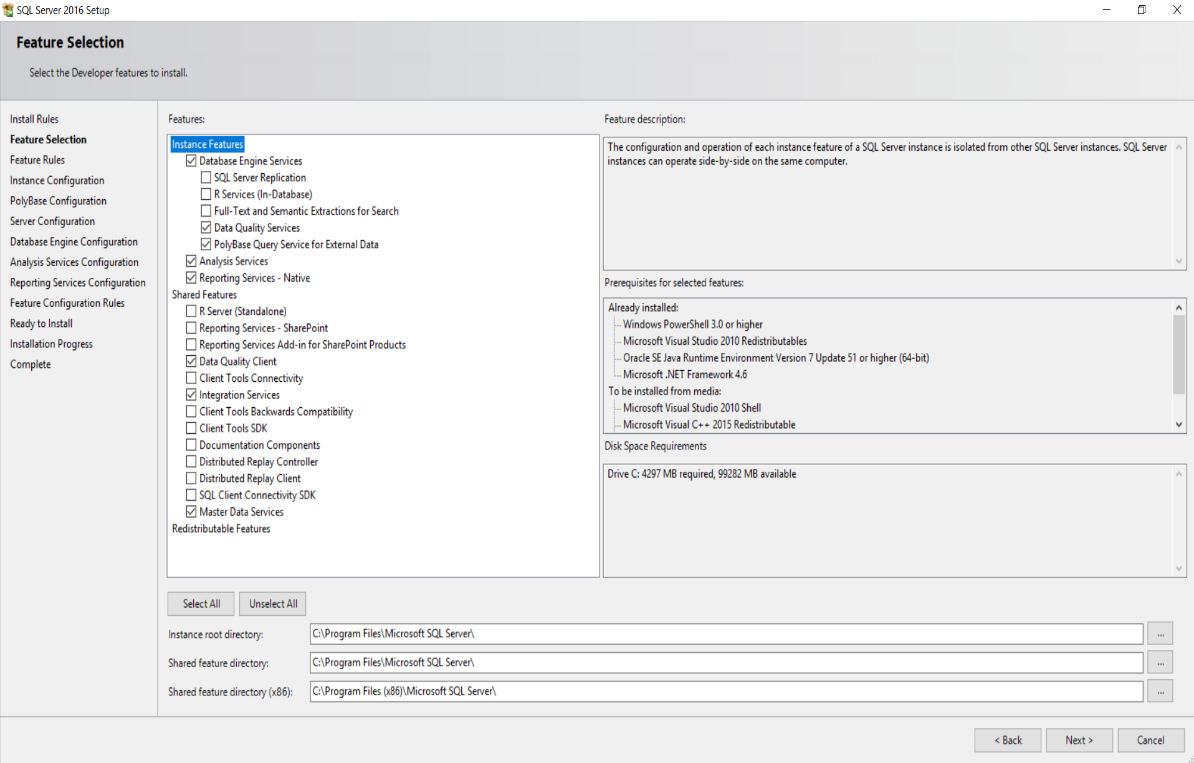
- Select all features checked in the preceding screenshot and click
Next, as shown in the following screenshot:
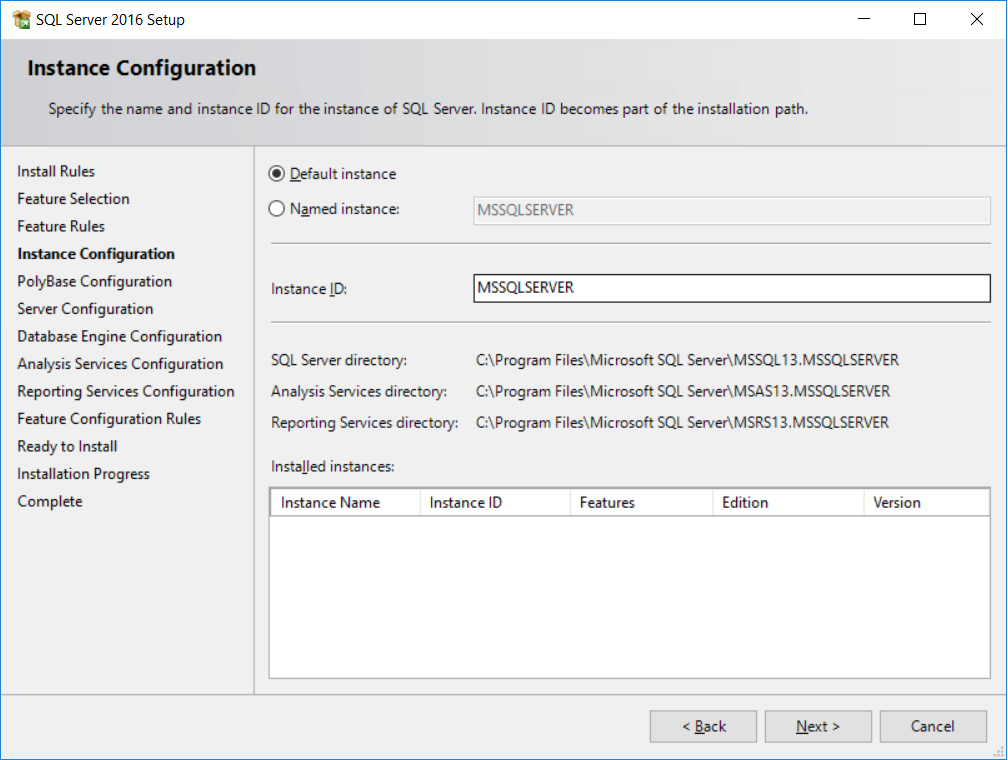
- Instance configuration allows to specify a name for the SQL Server service. This is done by selecting the
Named instanceradio button. Since we'll only use one SQL Server instance, leaveDefault instanceselected and clickNext, as shown in the following screenshot:
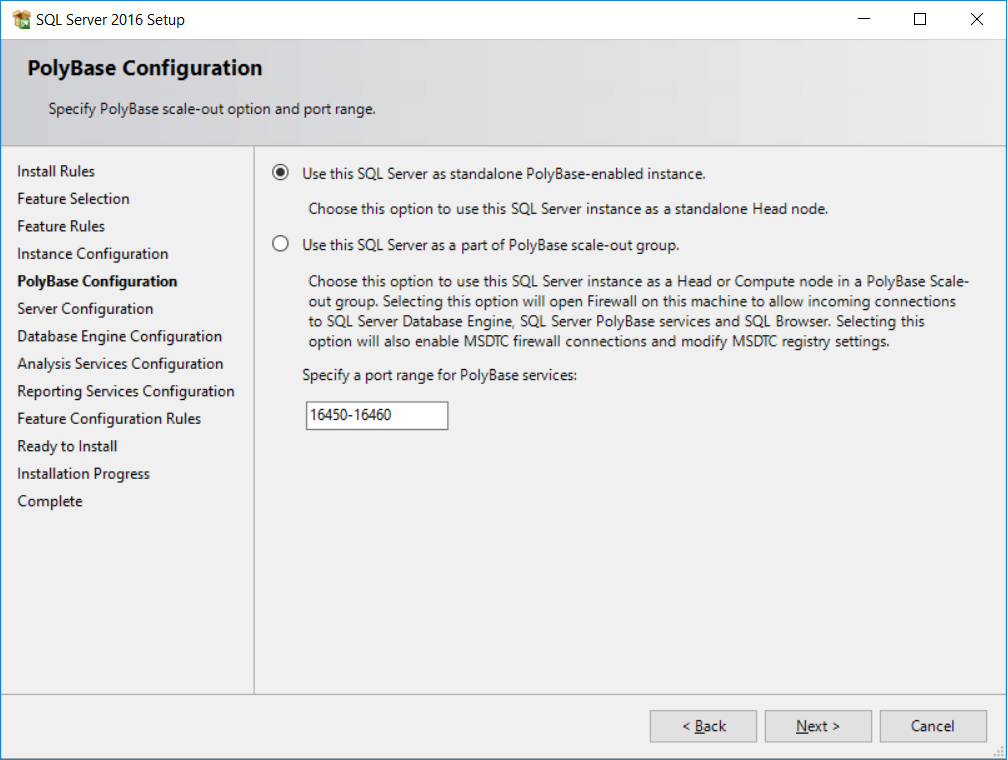
- This page allows SQL Server to be part of a PolyBase scale out group. Since we're only setting up SQL Server PolyBase to be used by one instance, leave the default
Use this SQL Server as standalone PolyBase-enabled instanceand clickNext, as shown in the following screenshot:
- Now for server configuration. This step allows us to specify distinct or specific service accounts. Since we're installing SQL Server on a single development machine, we'll use the default accounts, as shown in the following screenshot:
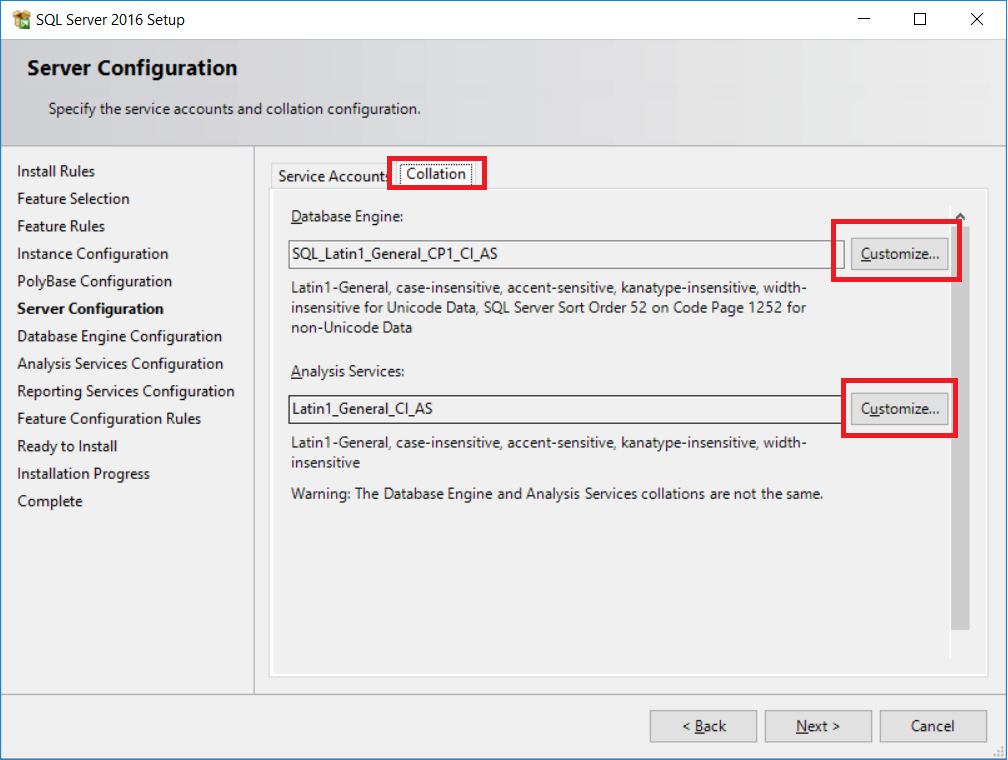
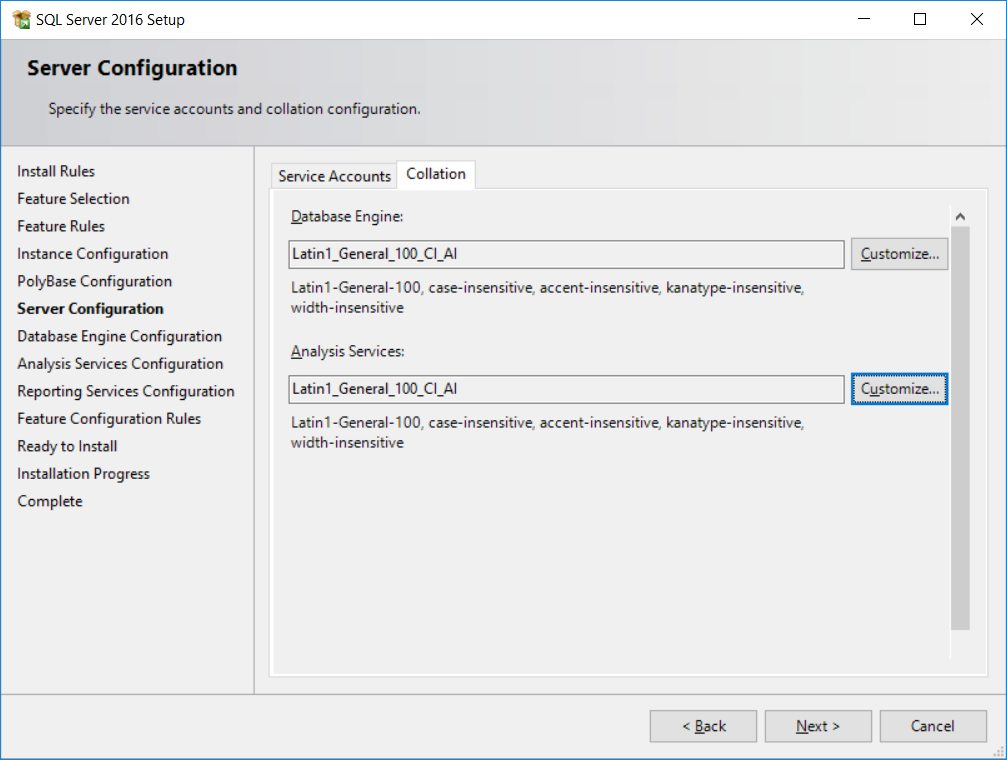
- Click on the
Collationtab as highlighted on the preceding screenshot. The default collation used by SQL server isSQL Latin1_General_CP1_CI_AS. This is a legacy collation. The choice of the collation is important for character string columns. The latest (fewer bugs) collation isLatin1_General_100. The last charactersCIandASare for case-insensitive and accent-sensitive, respectively. - We'll change the collation defaults. Click
Customize...at the end ofSQL Latin1_General_CP1_CI_AI, as shown in the following screenshot:
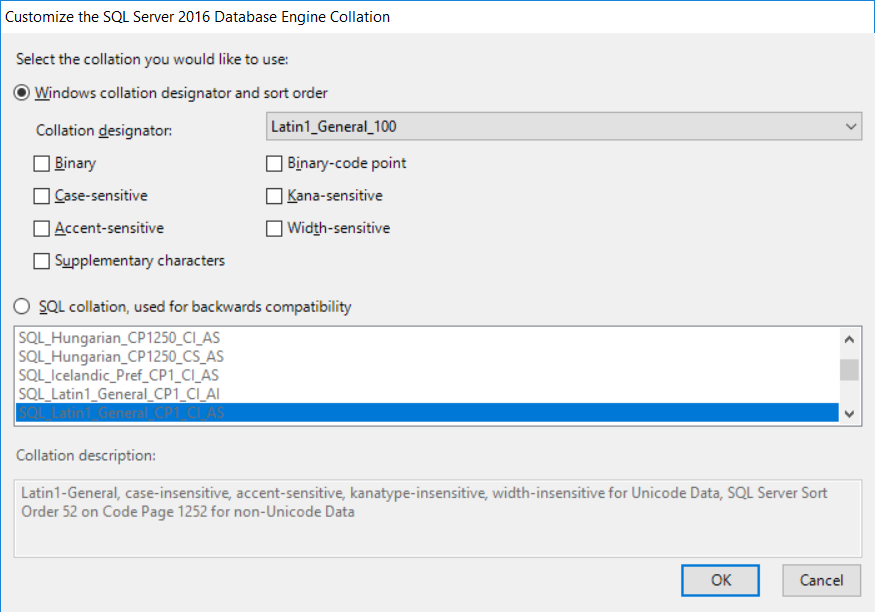
- As stated previously, we'll use the Windows collation designator
Latin1_General_100. UncheckAccent-sensitive. This allows SQL Server to sort character columns without using accentuated characters. For example, suppose that our application has aFirstNamecolumn and we have the following first names:JoelJoël
- If we query SQL Server filtering on
FirstName = 'Joel'with theAccent-sensitivecollation option, we end up retrieving the valueJoelonly. If we do not select theAccent-sensitivecollation option, we will get both values. - Click
OKwhen done to return to the previous screen. We'll do the same for analysis services; clickCustomize...to customize analysis service collation, as shown in the following screenshot:
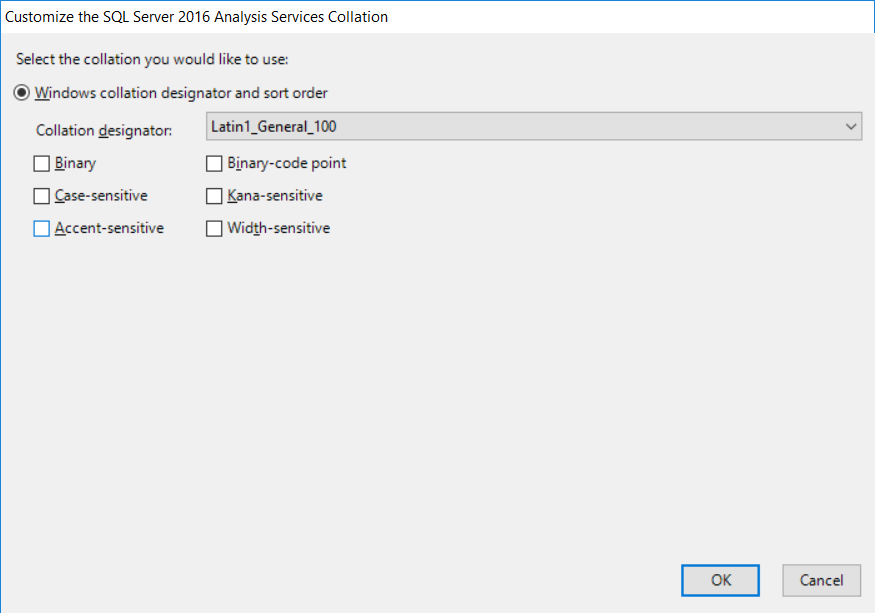
- Again, choose
Latin1_General_100in Collation designator and uncheck theAccent-sensitivecheckbox. ClickOKto return to the previous screen. Click onNext, as shown in the following screenshot:
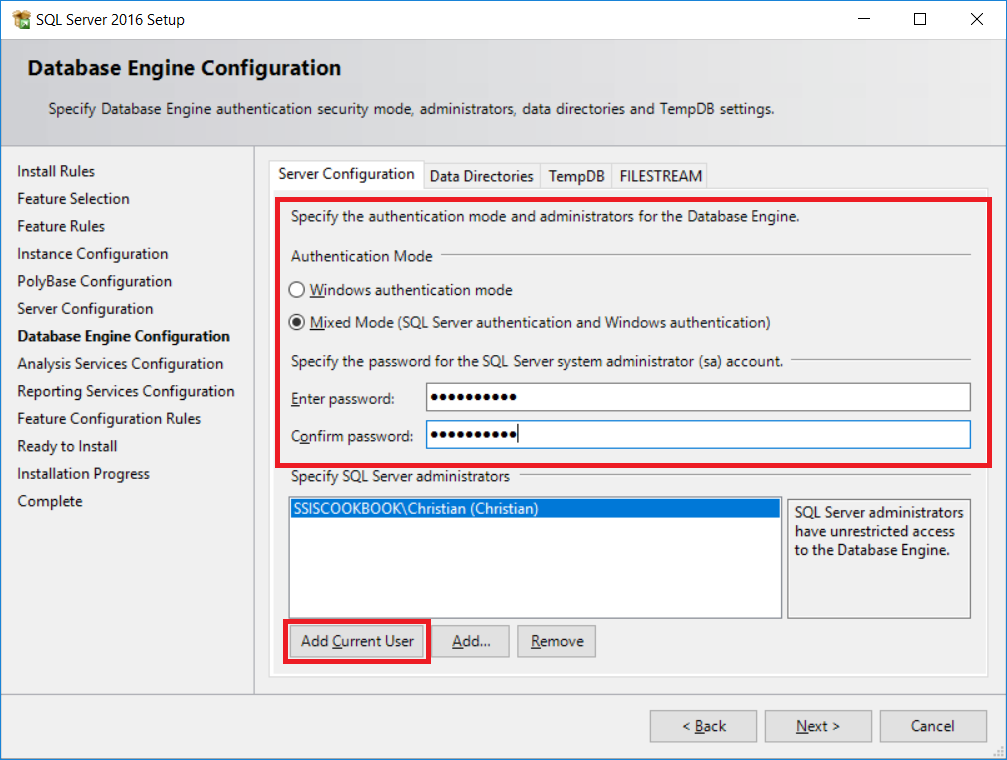
- This will direct you to the following screen. For the database engine configuration, we'll use
Mixed Modeto allow us to use SQL Server logins and Windows logins. The default authentication isWindows authentication mode, which is more secure than SQL Server authentication because it uses the Kerberos security protocol, password, and account lockout policies, and password expiration. Make sure you use strong passwords for SQL Server logins. By default, password policy, password expiration, and user must change password at next login are turned on also for SQL Server login. You should not disable the password policy and the password expiration. Select theMixed Moderadio box and enter a password for the SA account. Click onAdd Current Useras shown in the screenshot to add your Windows account as an administrator of the instance. You'll have all rights on it. ClickNext, which will direct you to theAnalysis Services Configurationwindow, as shown in the following screenshot:
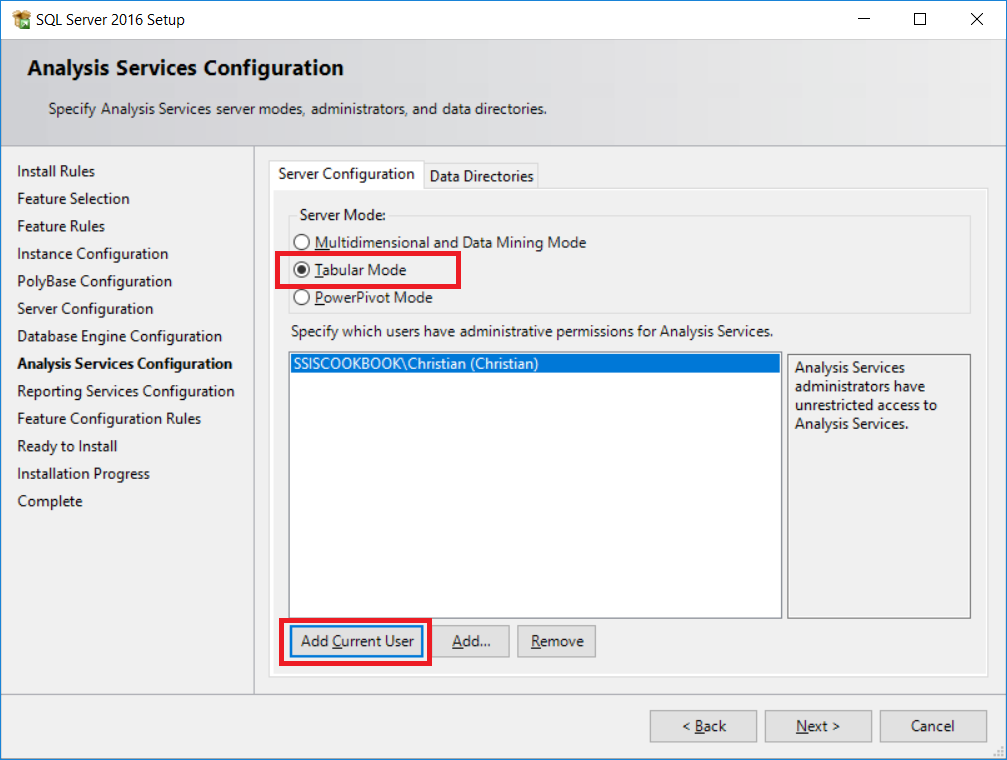
- For analysis services configuration, the
Server Modewe'll use isTabular Modeand again click onAdd Current Useras shown in the following screenshot to add your Windows account as an administrator of the service. ClickNext.
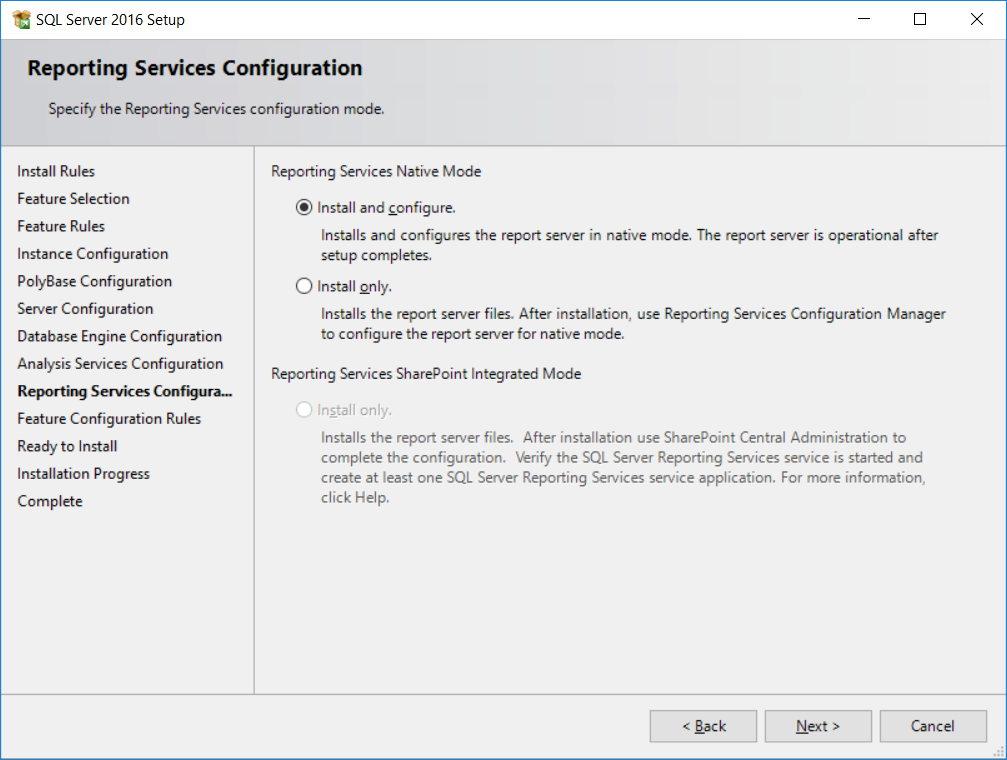
- For the Reporting services configuration, leave the default values and click
Next, as shown in the following screenshot:
- We're finally ready to install. Click
Installto start the installation process, as shown in the following screenshot:

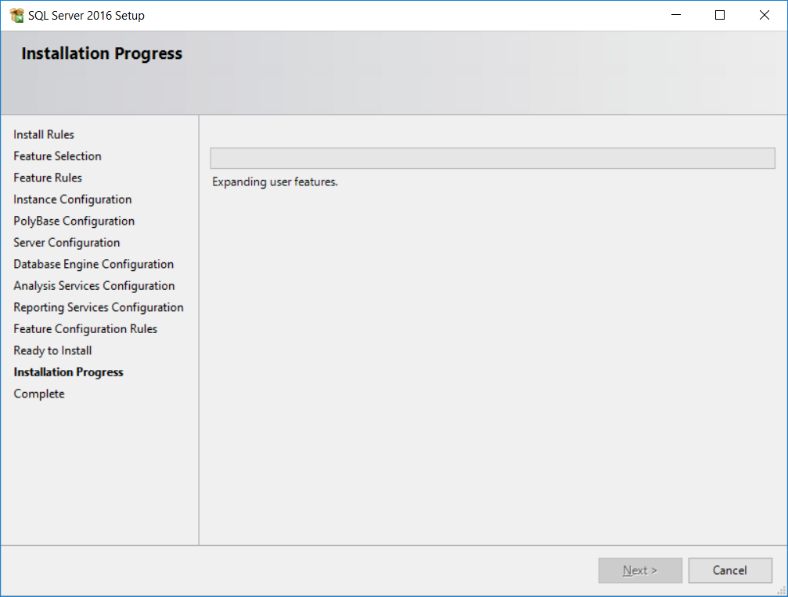
- The following screenshot shows the installation progress:
- Once the installation is complete, you get the following screen:
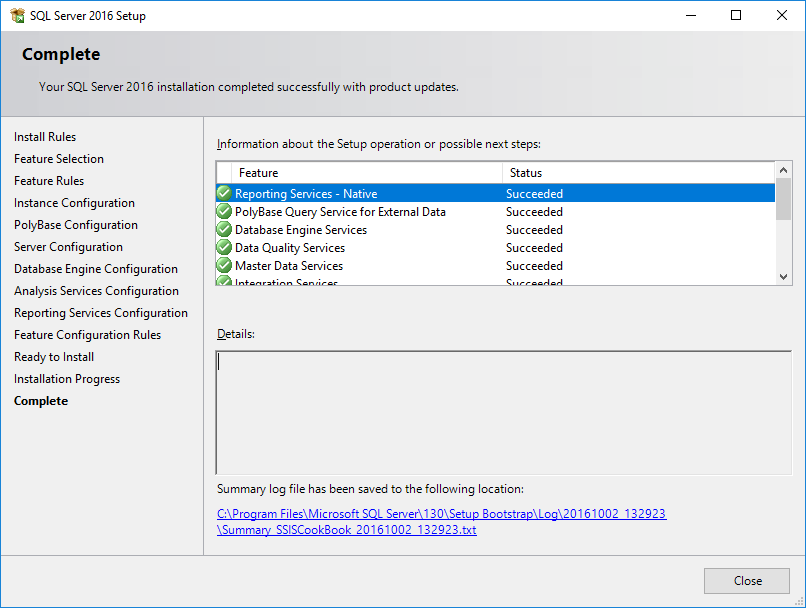
We're done. We just installed SQL Server 2016! In the next section, we'll install SQL Server Management Studio.
Note
The number, the order, and the appearance of the setup screens change slightly with every version of SQL Server, or even with a service pack. If you encounter a new screen not mentioned here, just use the default settings and proceed with the installation.