Getting started
The Power BI Desktop is available free and can be found via a direct download link at Power BI(https://powerbi.microsoft.com/), or by installing it as an app from Windows Store. There are several benefits in using the Windows Store Power BI app, including automatic updates, no requirement for admin privileges, and making it easier for planned IT roll-out of Power BI.
Note
If you are using the on-premises Power BI Report Server for your deployment strategy, then you must download a different Power BI Desktop, which is available by clicking the advanced download options at https://powerbi.microsoft.com/en-us/report-server/. A separate install is required because updates are released more often to Power BI in the cloud. This book will be written primarily under the assumption that the reader is using the cloud-hosted Power BI Service as their deployment strategy.
Once you download, install, and launch the Power BI Desktop, you will likely be welcomed by the Start screen, which is designed to help new users find their way. Close this start screen so we can review some of the most commonly used features of the application:

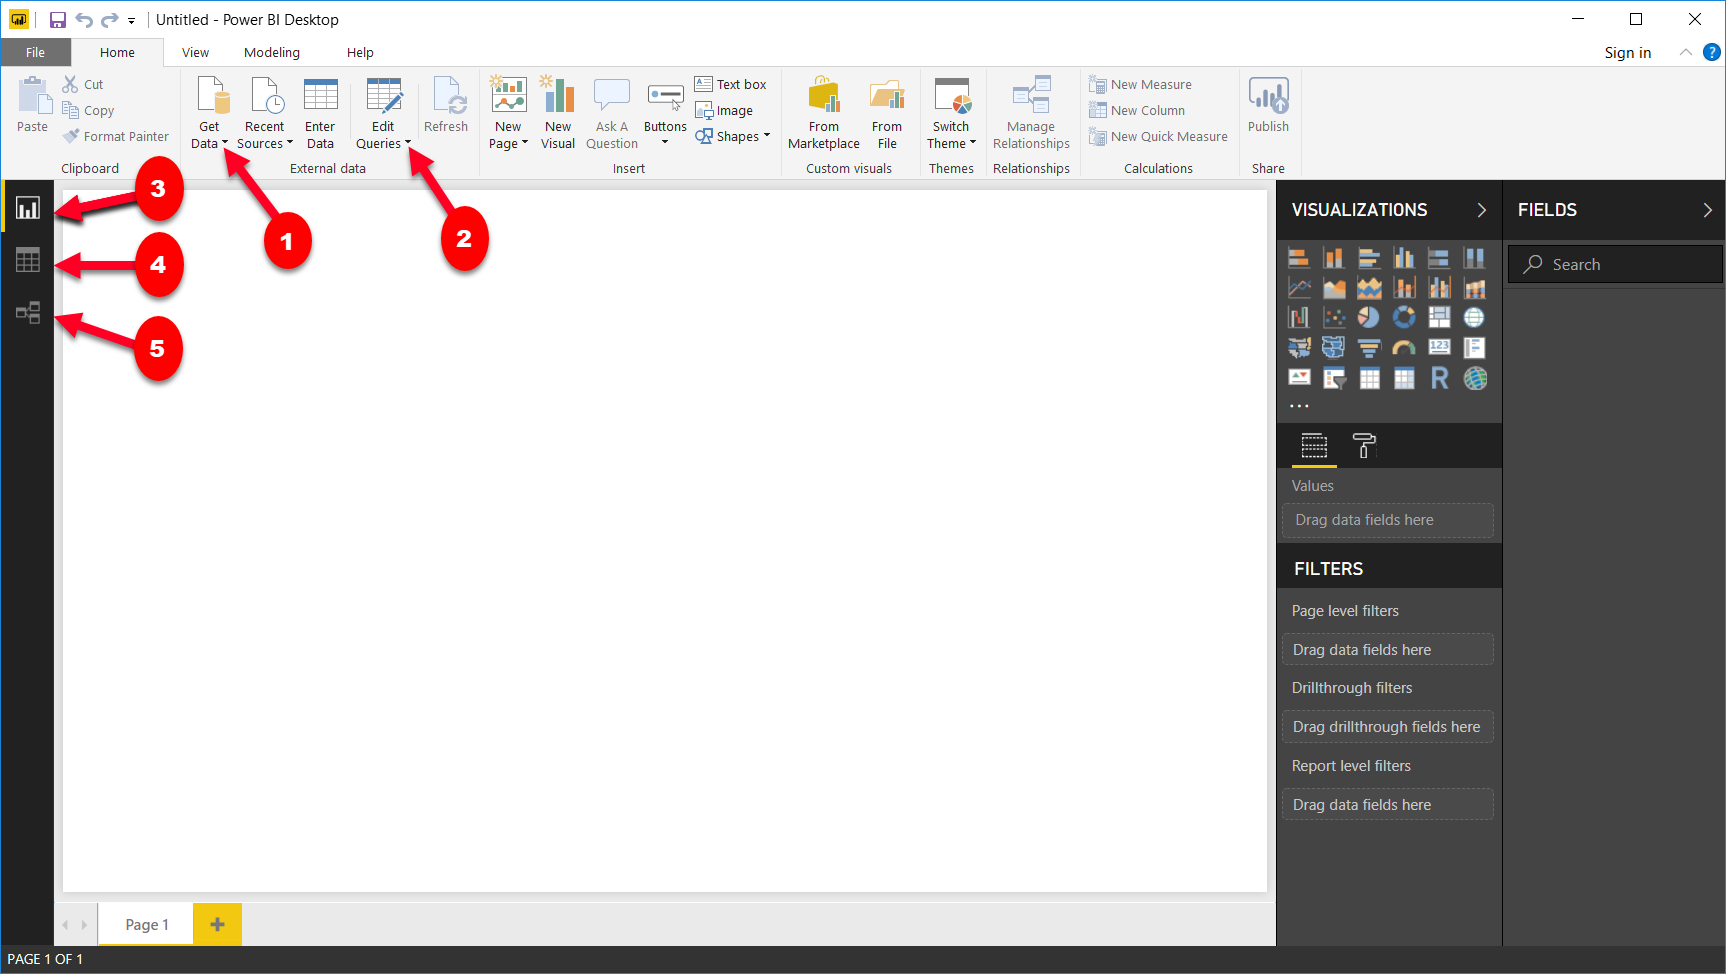
Power BI Desktop
Following the numbered figures, let's learn the names and purposes of some of the most important features in the Power BI Desktop:
- Get Data: Used for selecting and configuring data sources.
- Edit Queries: Launches the
Power Query Editor, which is used for applying data transformations to incoming data. - Report View: The report canvas used for designing data visualizations. This is the default view open when the Power BI Desktop is launched.
- Data View: Provides a view of the data in your model. This looks similar to a typical Excel spreadsheet, but it is read-only.
- Relationship View: Primarily used when your data model has multiple tables and relationships need to be defined between them.


