The first step to ensure that we are able to access the network is to make sure that it has connectivity to either a wired or wireless network to support updates and communications.
You may need to obtain an IP address through DHCP (Dynamic Host Configuration Protocol) by appending network configuration and adding the Ethernet adapter:
# nano /etc/network/interfaces
iface eth0 inet dhcp
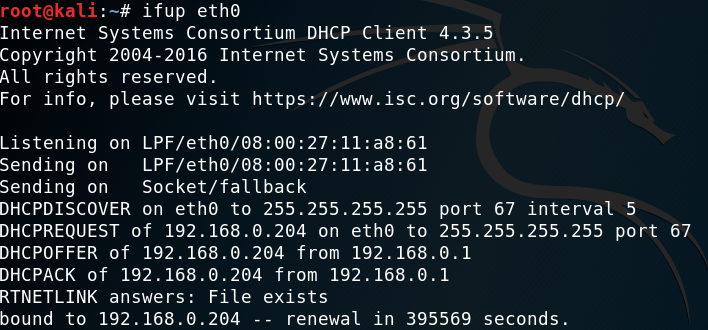
Once the network configuration file is appended, you should be able to bring up the ifup script to automatically assign the IP address as shown in the following screenshot:

In the case of a static IP, you can append the same network configuration file with the following lines and quickly set up a static IP to your Kali Linux:
# nano /etc/network/interfaces
iface eth0 inet static
address <your address>
netmask <subnet mask>
broadcast <broadcast mask>
gateway <default gateway>

# nano /etc/resolv.conf
nameserver <your DNS ip> or <Google DNS (8.8.8.8)>
By default, Kali does not start with the DHCP service enabled. Doing so announces the new IP address to the network, and this may alert administrators about the presence of the tester. For some test cases, this may not be an issue, and it may be advantageous to have certain services start automatically during boot up. This can be achieved by entering the following commands:
update-rc.d networking defaults
/etc/init.d/networking restart
Kali installs with network services that can be started or stopped as required, including DHCP, HTTP, SSH, TFTP, and the VNC server. These services are usually invoked from the command line, however, some are accessible from the Kali menu.
 United States
 Great Britain
 India
India
 Germany
 France
 Canada
 Russia
 Spain
Spain
 Brazil
 Australia
 Singapore
 Hungary
 Philippines
 Mexico
 Thailand
 Ukraine
 Luxembourg
 Estonia
 Lithuania
 Norway
 Chile
Chile
 South Korea
 Ecuador
 Colombia
 Taiwan
 Switzerland
 Indonesia
 Cyprus
 Denmark
 Finland
 Poland
 Malta
Malta
 Czechia
 New Zealand
 Austria
 Turkey
 Sweden
 Italy
Italy
 Egypt
Egypt
 Belgium
 Portugal
 Slovenia
 Ireland
 Romania
 Greece
 Argentina
 Malaysia
 South Africa
 Netherlands
 Bulgaria
 Latvia
 Japan
Japan
 Slovakia


