We need to run some configurations to ensure that the project settings are correct before being able to run the samples that are provided by Spark or any of the programs listed this book.
Configuring IntelliJ to work with Spark and run Spark ML sample codes
Getting ready
We need to be particularly careful when configuring the project structure and global libraries. After we set everything up, we proceed to run the sample ML code provided by the Spark team to verify the setup. Sample code can be found under the Spark directory or can be obtained by downloading the Spark source code with samples.
How to do it...
The following are the steps for configuring IntelliJ to work with Spark MLlib and for running the sample ML code provided by Spark in the examples directory. The examples directory can be found in your home directory for Spark. Use the Scala samples to proceed:
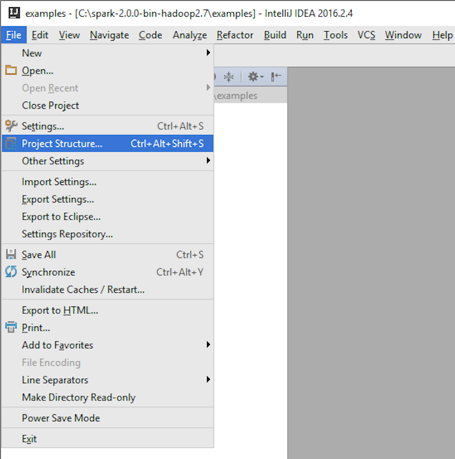
- Click on the Project Structure... option, as shown in the following screenshot, to configure project settings:
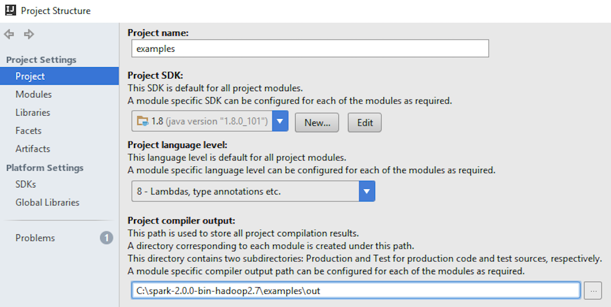
- Verify the settings:
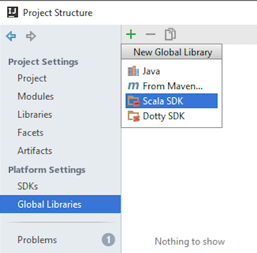
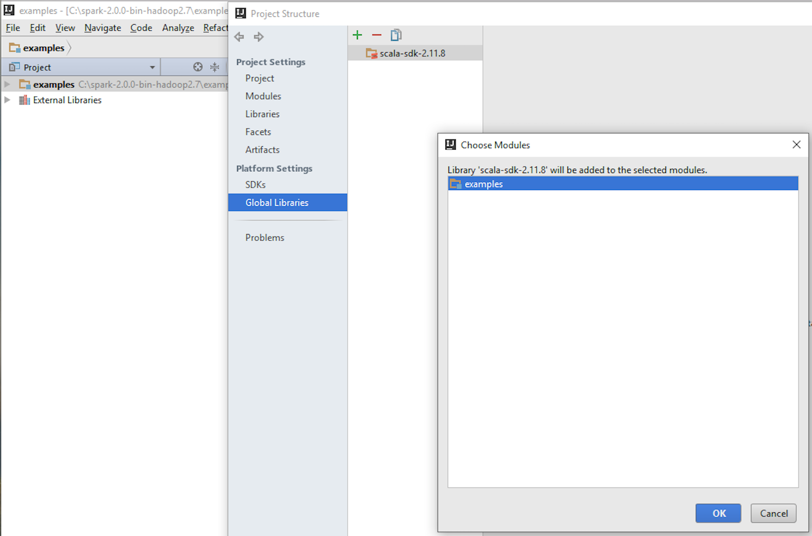
- Configure Global Libraries. Select Scala SDK as your global library:
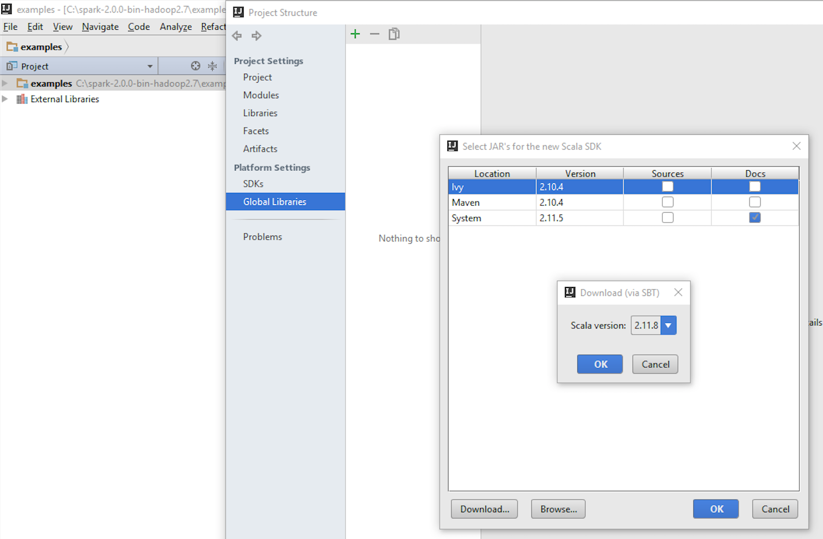
- Select the JARs for the new Scala SDK and let the download complete:
- Select the project name:
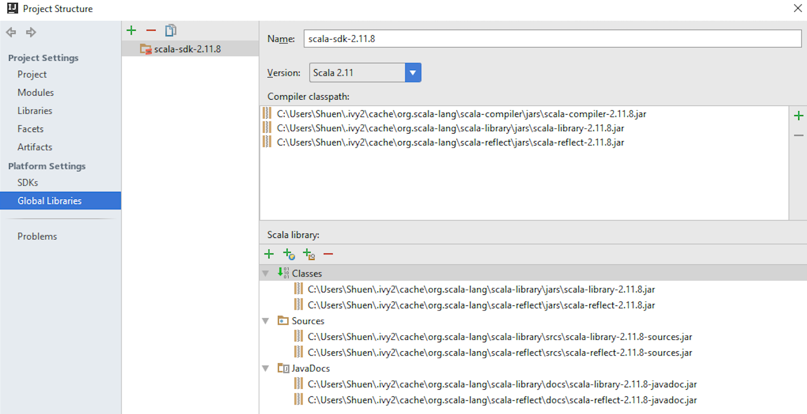
- Verify the settings and additional libraries:
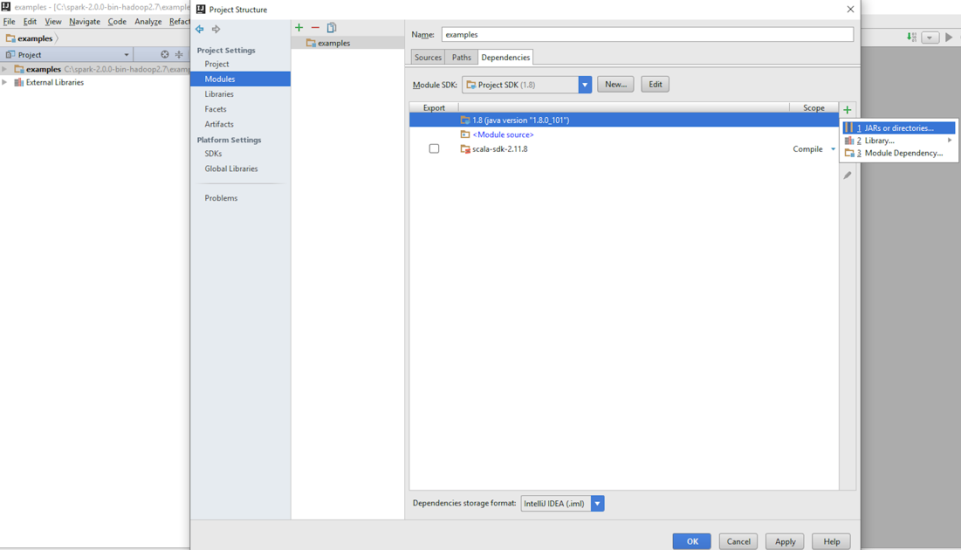
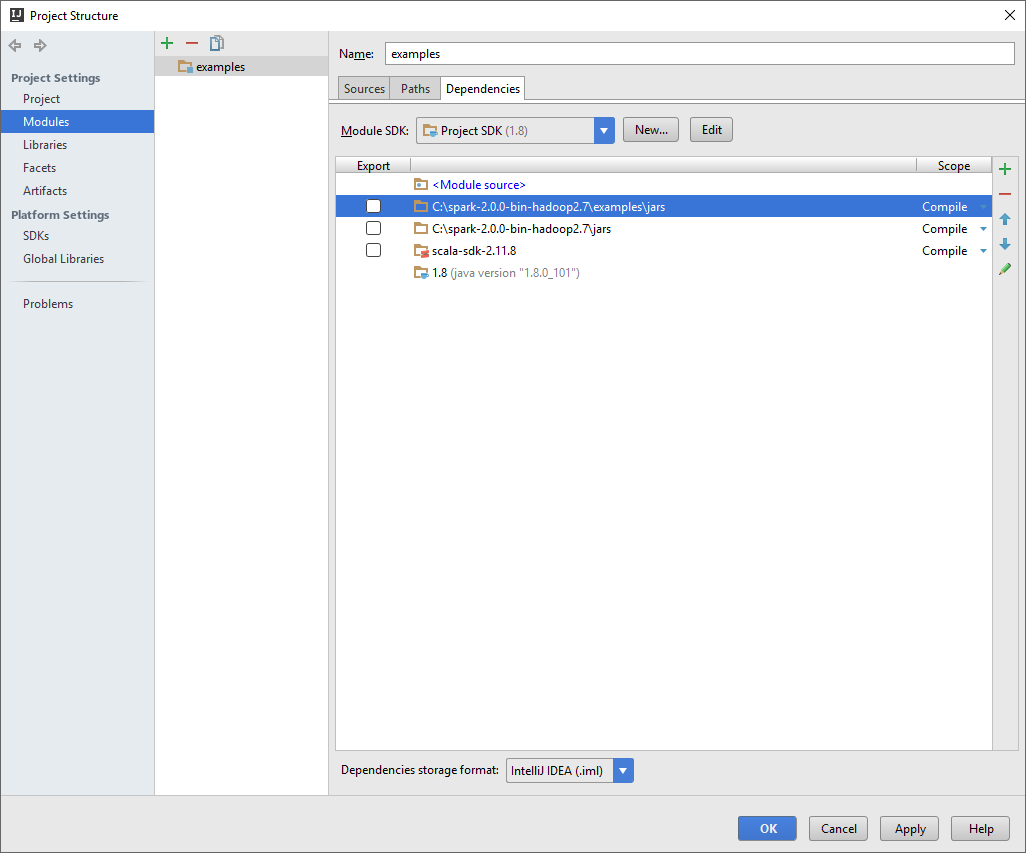
- Add dependency JARs. Select modules under the Project Settings in the left-hand pane and click on dependencies to choose the required JARs, as shown in the following screenshot:
- Select the JAR files provided by Spark. Choose Spark's default installation directory and then select the lib directory:
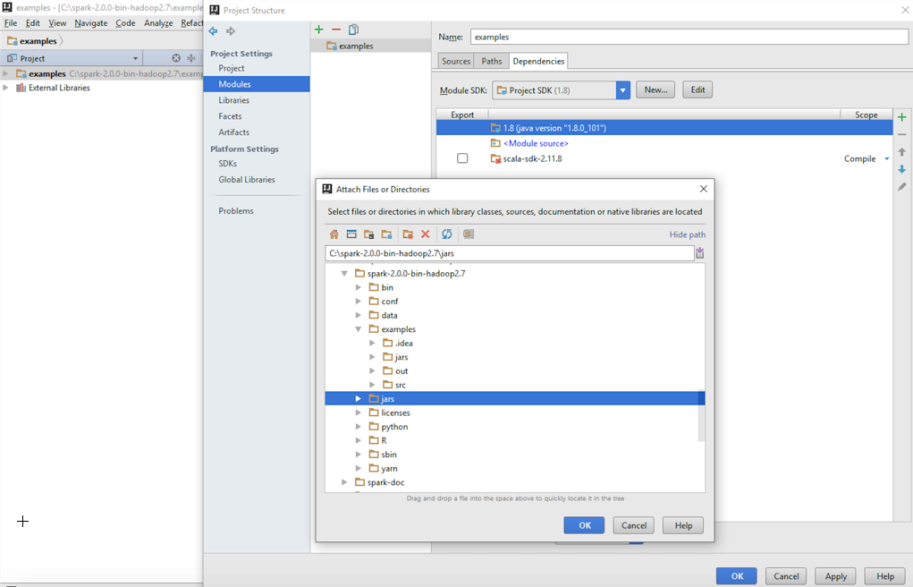
- We then select the JAR files for examples that are provided for Spark out of the box.
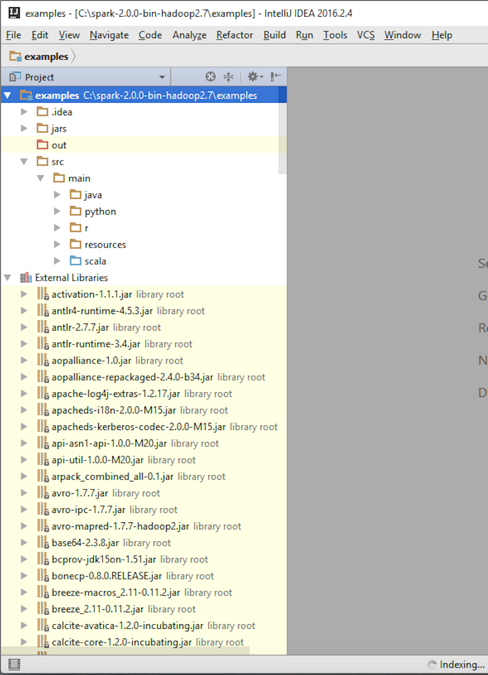
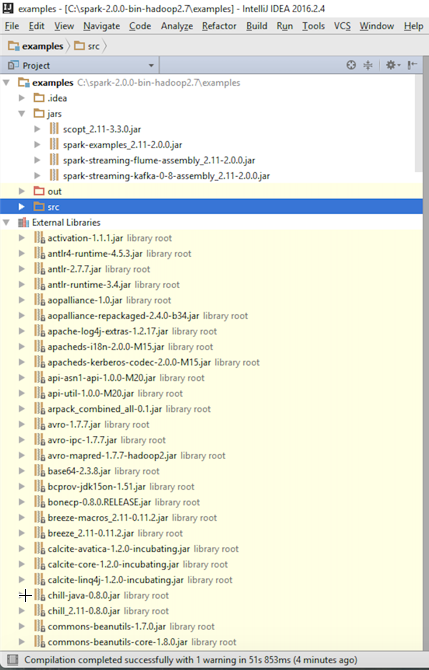
- Add required JARs by verifying that you selected and imported all the JARs listed under External Libraries in the the left-hand pane:
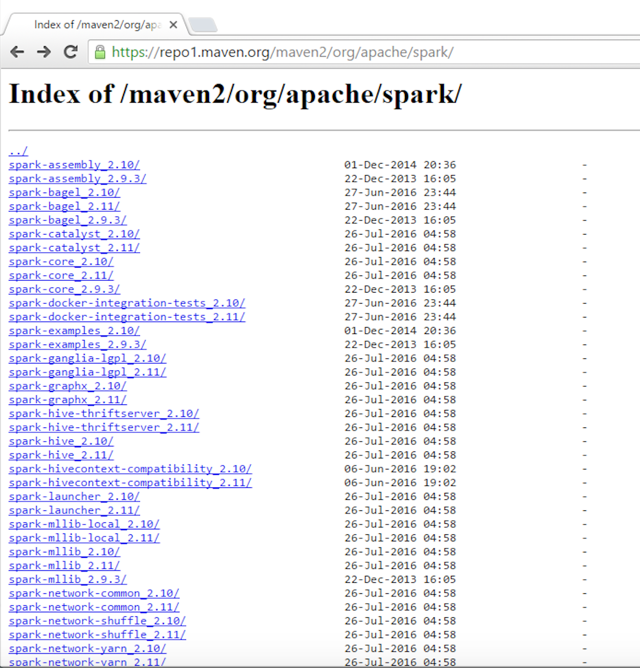
- Spark 2.0 uses Scala 2.11. Two new streaming JARs, Flume and Kafka, are needed to run the examples, and can be downloaded from the following URLs:
The next step is to download and install the Flume and Kafka JARs. For the purposes of this book, we have used the Maven repo:
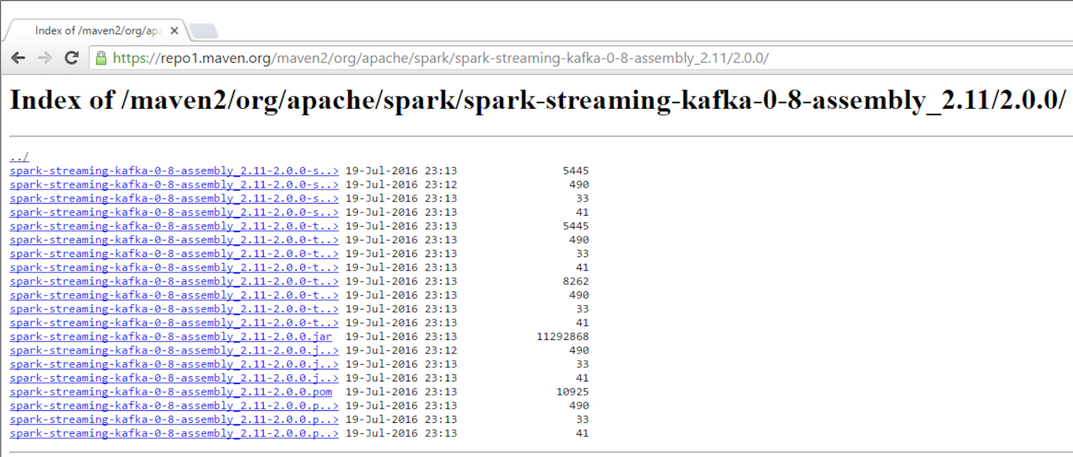
- Download and install the Kafka assembly:
- Download and install the Flume assembly:
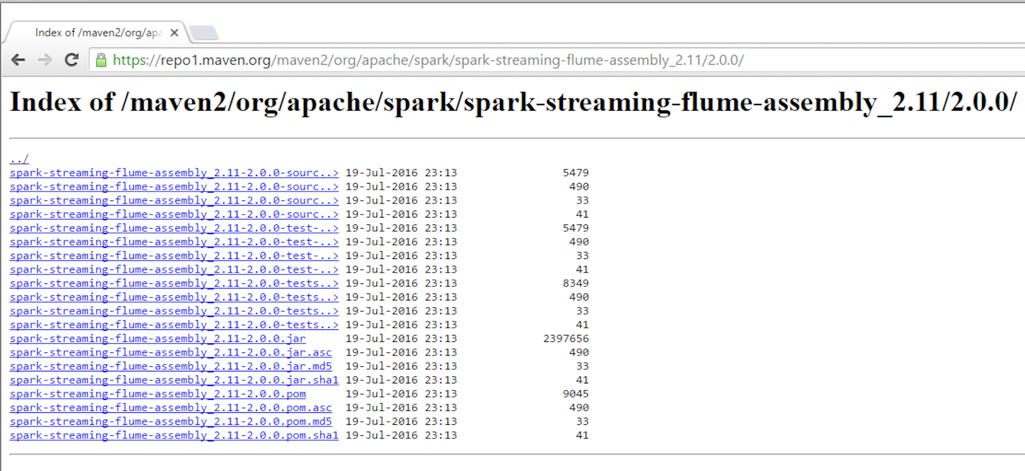
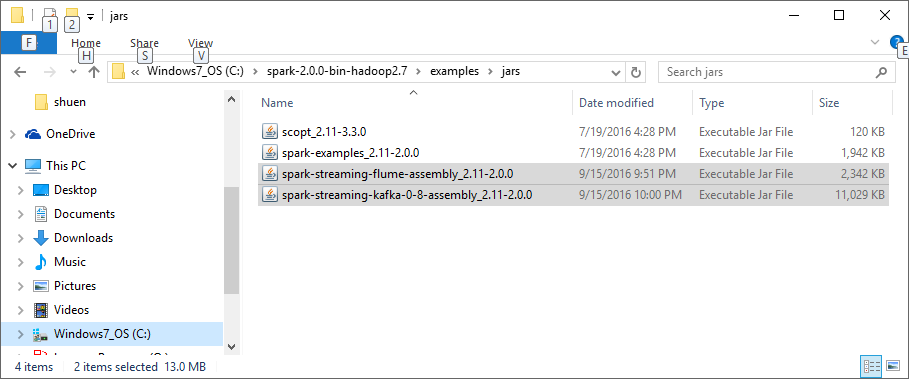
- After the download is complete, move the downloaded JAR files to the lib directory of Spark. We used the C drive when we installed Spark:
- Open your IDE and verify that all the JARs under the External Libraries folder on the left, as shown in the following screenshot, are present in your setup:
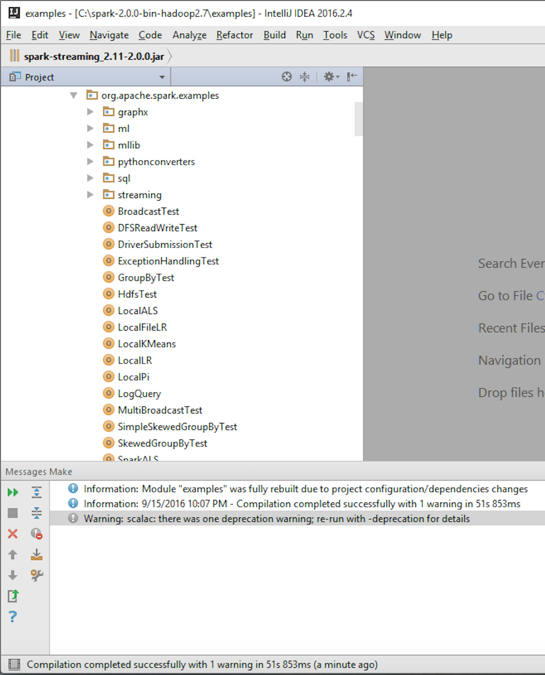
- Build the example projects in Spark to verify the setup:
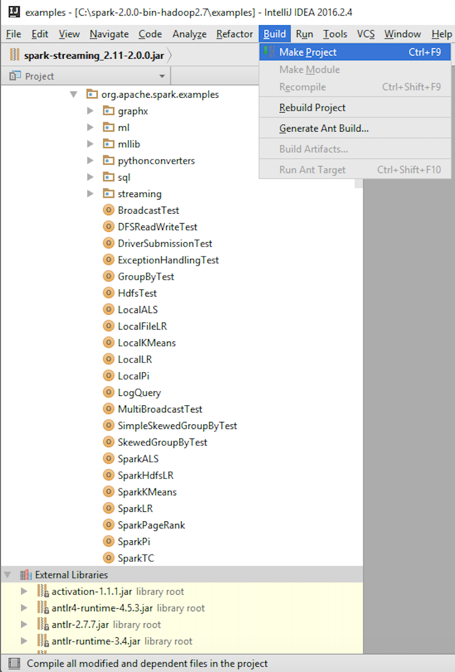
- Verify that the build was successful:
There's more...
Prior to Spark 2.0, we needed another library from Google called Guava for facilitating I/O and for providing a set of rich methods of defining tables and then letting Spark broadcast them across the cluster. Due to dependency issues that were hard to work around, Spark 2.0 no longer uses the Guava library. Make sure you use the Guava library if you are using Spark versions prior to 2.0 (required in version 1.5.2). The Guava library can be accessed at the following URL:
https://github.com/google/guava/wiki
You may want to use Guava version 15.0, which can be found here:
https://mvnrepository.com/artifact/com.google.guava/guava/15.0
If you are using installation instructions from previous blogs, make sure to exclude the Guava library from the installation set.
See also
If there are other third-party libraries or JARs required for the completion of the Spark installation, you can find those in the following Maven repository:


