This article by Skanda Bhargav, the author of Troubleshooting Ubuntu Server, deals with virtualization techniques—why virtualization is important and how administrators can install and serve users with services via virtualization. We will learn about KVM, Xen, and Qemu. So sit back and let's take a spin into the virtual world of Ubuntu.
(For more resources related to this topic, see here.)
What is virtualization?
Virtualization is a technique by which you can convert a set of files into a live running machine with an OS. It is easy to set up one machine and much easier to clone and replicate the same machine across hardware. Also, each of the clones can be customized based on requirements. We will look at setting up a virtual machine using Kernel-based Virtual Machine, Xen, and Qemu in the sections that follow.
Today, people are using the power of virtualization in different situations and environments. Developers use virtualization in order to have an independent environment in which to safely test and develop applications without affecting other working environments. Administrators are using virtualization to separate services and also commission or decommission services as and when required or requested.
By default, Ubuntu supports the Kernel-based Virtual Machine (KVM), which has built-in extensions for AMD and Intel-based processors. Xen and Qemu are the options suggested where you have hardware that does not have extensions for virtualization.
libvirt
The libvirt library is an open source library that is helpful for interfacing with different virtualization technologies. One small task before starting with libvirt is to check your hardware support extensions for KVM. The command to do so is as follows:
kvm-ok
You will see a message stating whether or not your CPU supports hardware virtualization. An additional task would be to verify the BIOS settings for virtualization and activate it.
Installation
Use the following command to install the package for libvirt:
sudo apt-get install kvm libvirt-bin
Next, you will need to add the user to the group libvirt. This will ensure that user gets additional options for networking. The command is as follows:
sudo adduser $USER libvirtd
We are now ready to install a guest OS. Its installation is very similar to that of installing a normal OS on the hardware. If your virtual machine needs a graphical user interface (GUI), you can make use of an application virt-viewer and connect using VNC to the virtual machine's console. We will be discussing the virt-viewer and its uses in the later sections of this article.
virt-install
virt-install is a part of the python-virtinst package. The command to install this package is as follows:
sudo apt-get install python-virtinst
One of the ways of using virt-install is as follows:
sudo virt-install -n new_my_vm -r 256 -f new_my_vm.img
-s 4 -c jeos.iso --accelerate
--connect=qemu:///system --vnc
--noautoconsole -v
Let's understand the preceding command part by part:
- -n: This specifies the name of virtual machine that will be created
- -r: This specifies the RAM amount in MBs
- -f: This is the path for the virtual disk
- -s: This specifies the size of the virtual disk
- -c: This is the file to be used as virtual CD, but it can be an .iso file as well
- --accelerate: This is used to make use of kernel acceleration technologies
- --vnc: This exports the guest console via vnc
- --noautoconsole: This disables autoconnect for the virtual machine console
- -v: This creates a fully virtualized guest
Once virt-install is launched, you may connect to console with virt-viewer utility from remote connections or locally using GUI.
Use to wrap long text to next line.
virt-clone
One of the applications to clone a virtual machine to another is virt-clone. Cloning is a process of creating an exact replica of the virtual machine that you currently have. Cloning is helpful when you need a lot of virtual machines with same configuration. Here is an example of cloning a virtual machine:
sudo virt-clone -o my_vm -n new_vm_clone -f /path/to/ new_vm_clone.img --connect=qemu:///sys
Let's understand the preceding command part by part:
- -o: This is the original virtual machine that you want to clone
- -n: This is the new virtual machine name
- -f: This is the new virtual machine's file path
- --connect: This specifies the hypervisor to be used
Managing the virtual machine
Let's see how to manage the virtual machine we installed using virt.
virsh
Numerous utilities are available for managing virtual machines and libvirt; virsh is one such utility that can be used via command line. Here are a few examples:
- The following command lists the running virtual machines:
virsh -c qemu:///system list
- The following command starts a virtual machine:
virsh -c qemu:///system start my_new_vm
- The following command starts a virtual machine at boot:
virsh -c qemu:///system autostart my_new_vm
- The following command restarts a virtual machine:
virsh -c qemu:///system reboot my_new_vm
- You can save the state of virtual machine in a file. It can be restored later. Note that once you save the virtual machine, it will not be running anymore. The following command saves the state of the virtual machine:
virsh -c qemu://system save my_new_vm my_new_vm-290615.state
- The following command restores a virtual machine from saved state:
virsh -c qemu:///system restore my_new_vm-290615.state
- The following command shuts down a virtual machine:
virsh -c qemu:///system shutdown my_new_vm
- The following command mounts a CD-ROM in the virtual machine:
virsh -c qemu:///system attach-disk my_new_vm /dev/cdrom /media/cdrom
The virtual machine manager
A GUI-type utility for managing virtual machines is virt-manager. You can manage both local and remote virtual machines. The command to install the package is as follows:
sudo apt-get install virt-manager
The virt-manager works on a GUI environment. Hence, it is advisable to install it on a remote machine other than the production cluster, as production cluster should be used for doing the main tasks. The command to connect the virt-manager to a local server running libvirt is as follows:
virt-manager -c qemu:///system
If you want to connect the virt-manager from a different machine, then first you need to have SSH connectivity. This is required as libvirt will ask for a password on the machine. Once you have set up passwordless authentication, use the following command to connect manager to server:
virt-manager -c qemu+ssh://virtnode1.ubuntuserver.com/system
Here, the virtualization server is identified with the hostname ubuntuserver.com.
The virtual machine viewer
A utility for connecting to your virtual machine's console is virt-viewer. This requires a GUI to work with the virtual machine.
Use the following command to install virt-viewer:
sudo apt-get install virt-viewer
Now, connect to your virtual machine console from your workstation using the following command:
virt-viewer -c qemu:///system my_new_vm
You may also connect to a remote host using SSH passwordless authentication by using the following command:
virt-viewer -c qemu+ssh://virtnode4.ubuntuserver.com/system my_new_vm
JeOS
JeOS, short for Just Enough Operation System, is pronounced as "Juice" and is an operating system in the Ubuntu flavor. It is specially built for running virtual applications. JeOS is no longer available as a downloadable ISO CD-ROM. However, you can pick up any of the following approaches:
- Get a server ISO of the Ubuntu OS. While installing, hit F4 on your keyboard. You will see a list of items and select the one that reads Minimal installation. This will install the JeOS variant.
- Build your own copy with vmbuilder from Ubuntu.
The kernel of JeOS is specifically tuned to run in virtual environments. It is stripped off of the unwanted packages and has only the base ones. JeOS takes advantage of the technological advancement in VMware products. A powerful combination of limited size with performance optimization is what makes JeOS a preferred OS over a full server OS in a large virtual installation.
Also, with this OS being so light, the updates and security patches will be small and only limited to this variant. So, the users who are running their virtual applications on the JeOS will have less maintenance to worry about compared to a full server OS installation.
vmbuilder
The second way of getting the JeOS is by building your own copy of Ubuntu; you need not download any ISO from the Internet. The beauty of vmbuilder is that it will get the packages and tools based on your requirements. Then, build a virtual machine with these and the whole process is quick and easy. Essentially, vmbuilder is a script that will automate the process of creating a virtual machine, which can be easily deployed. Currently, the virtual machines built with vmbuilder are supported on KVM and Xen hypervisors.
Using command-line arguments, you can specify what additional packages you require, remove the ones that you feel aren't necessary for your needs, select the Ubuntu version, and do much more. Some developers and admins contributed to the vmbuilder and changed the design specifics, but kept the commands same. Some of the goals were as follows:
- Reusability by other distributions
- Plugin feature added for interactions, so people can add logic for other environments
- A web interface along with CLI for easy access and maintenance
Setup
Firstly, we will need to set up libvirt and KVM before we use vmbuilder. libvirt was covered in the previous section. Let's now look at setting up KVM on your server.
We will install some additional packages along with the KVM package, and one of them is for enabling X server on the machine. The command that you will need to run on your Ubuntu server is as follows:
sudo apt-get install qemu-kvm libvirt-bin ubuntu-vm-builder bridge-utils
The output of this command will be as follows:

Let's look at what each of the packages mean:
- libvirt-bin: This is used by libvirtd for administration of KVM and Qemu
- qemu-kvm: This runs in the background
- ubuntu-vm-builder: This is a tool for building virtual machines from the command line
- bridge-utils: This enables networking for various virtual machines
Adding users to groups
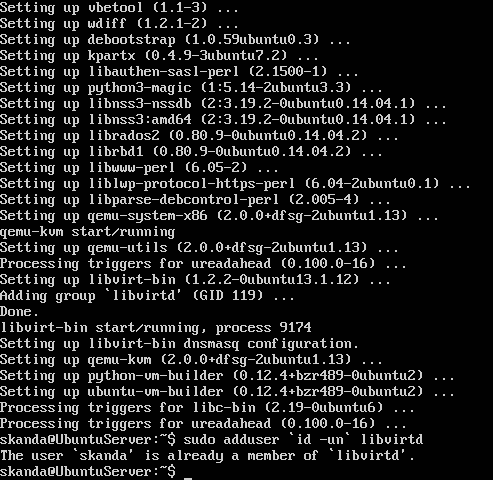
You will have to add the user to the libvirtd command; this will enable them to run virtual machines. The command to add the current user is as follows:
sudo adduser `id -un` libvirtd
The output is as follows:
Installing vmbuilder
Download the latest vmbuilder called python-vm-builder. You may also use the older ubuntu-vm-builder, but there are slight differences in the syntax.
The command to install python-vm-builder is as follows:
sudo apt-get install python-vm-builder
The output will be as follows:
Unlock access to the largest independent learning library in Tech for FREE!
Get unlimited access to 7500+ expert-authored eBooks and video courses covering every tech area you can think of.
Renews at €18.99/month. Cancel anytime

Defining the virtual machine
While defining the virtual machine that you want to build, you need to take care of the following two important points:
- Do not assume that the enduser will know the technicalities of extending the disk size of virtual machine if the need arises. Either have a large virtual disk so that the application can grow or document the process to do so. However, it would be better to have your data stored in an external storage device.
- Allocating RAM is fairly simple. But remember that you should allocate your virtual machine an amount of RAM that is safe to run your application.
To check the list of parameters that vmbuilder provides, use the following command:
vmbuilder ––help

The two main parameters are virtualization technology, also known as hypervisor, and targeted distribution.
The distribution we are using is Ubuntu 14.04, which is also known as trusty because of its codename. The command to check the release version is as follows:
lsb_release -a
The output is as follows:

Let's build a virtual machine on the same version of Ubuntu. Here's an example of building a virtual machine with vmbuilder:
sudo vmbuilder kvm ubuntu --suite trusty --flavour virtual --arch amd64 -o --libvirt qemu:///system
Now, we will discuss what the parameters mean:
- --suite: This specifies which Ubuntu release we want the virtual machine built on
- --flavour: This specifies which virtual kernel to use to build the JeOS image
- --arch: This specifies the processor architecture (64 bit or 32 bit)
- -o: This overwrites the previous version of the virtual machine image
- --libvirt: This adds the virtual machine to the list of available virtual machines
Now that we have created a virtual machine, let's look at the next steps.
JeOS installation
We will examine the settings that are required to get our virtual machine up and running.
IP address
A good practice for assigning IP address to the virtual machines is to set a fixed IP address, usually from the private pool. Then, include this info as part of the documentation. We will define an IP address with following parameters:
- --ip (address): This is the IP address in dotted form
- --mask (value): This is the IP mask in dotted form (default is 255.255.255.0)
- --net (value): This is the IP net address (default is X.X.X.0)
- --bcast (value): This is the IP broadcast (default is X.X.X.255)
- --gw (address): This is the gateway address (default is X.X.X.1)
- --dns (address): This is the name server address (default is X.X.X.1)
Our command looks like this now:
sudo vmbuilder kvm ubuntu --suite trusty --flavour virtual --arch amd64 -o --libvirt qemu:///system --ip 192.168.0.10
You may have noticed that we have assigned only the IP, and all others will take the default value.
Enabling the bridge
We will have to enable the bridge for our virtual machines, as various remote hosts will have to access the applications. We will configure libvirt and modify the vmbuilder template to do so.
First, create the template hierarchy and copy the default template into this folder:
mkdir -p VMBuilder/plugins/libvirt/templates
cp /etc/vmbuilder/libvirt/* VMBuilder/plugins/libvirt/templates/
Use your favorite editor and modify the following lines in the VMBuilder/plugins/libvirt/templates/libvirtxml.tmpl file:
<interface type='network'>
  <source network='default'/>
</interface>
Replace these lines with the following lines:
<interface type='bridge'>
  <source bridge='br0'/>
</interface>
Partitions
You have to allocate partitions to applications for their data storage and working. It is normal to have a separate storage space for each application in /var.
The command provided by vmbuilder for this is --part:
--part PATH
vmbuilder will read the file from the PATH parameter and consider each line as a separate partition. Each line has two entries, mountpoint and size, where size is defined in MBs and is the maximum limit defined for that mountpoint.
For this particular exercise, we will create a new file with name vmbuilder.partition and enter the following lines for creating partitions:
root 6000
swap 4000
---
/var 16000
Also, please note that different disks are identified by the delimiter ---.
Now, the command should be like this:
sudo vmbuilder kvm ubuntu --suite trusty --flavour virtual
--arch amd64 -o --libvirt qemu:///system --ip 192.168.0.10
--part vmbuilder.partition
Use to wrap long text to the next line.
Setting the user and password
We have to define a user and a password in order for the user to log in to the virtual machine after startup. For now, let's use a generic user identified as user and the password password. We can ask user to change the password after first login.
The following parameters are used to set the username and password:
- --user (username): This sets the username (default is ubuntu)
- --name (fullname): This sets a name for the user (default is ubuntu)
- --pass (password): This sets the password for the user (default is ubuntu)
So, now our command will be as follows:
sudo vmbuilder kvm ubuntu --suite trusty --flavour virtual
--arch amd64 -o --libvirt qemu:///system --ip 192.168.0.10
--part vmbuilder.partition --user user --name user --pass password
Final steps in the installation – first boot
There are certain things that will need to be done at the first boot of a machine. We will install openssh-server at first boot. This will ensure that each virtual machine has a key, which is unique. If we had done this earlier in the setup phase, all virtual machines would have been given the same key; this might have posed a security issue.
Let's create a script called first_boot.sh and run it at the first boot of every new virtual machine:
# This script will run the first time the virtual machine boots
# It is run as root
apt-get update
apt-get install -qqy --force-yes openssh-server
Then, add the following line to the command line:
--firstboot first_boot.sh
Final steps in the installation – first login
Remember we had specified a default password for the virtual machine. This means all the machines where this image will be used for installation will have the same password. We will prompt the user to change the password at first login. For this, we will use a shell script named first_login.sh. Add the following lines to the file:
# This script is run the first time a user logs in.
echo "Almost at the end of setting up your machine"
echo "As a security precaution, please change your password"
passwd
Then, add the parameter to your command line:
--firstlogin first_login.sh
Auto updates
You can make your virtual machine update itself at regular intervals. To enable this feature, add a package named unattended-upgrades to the command line:
--addpkg unattended-upgrades
ACPI handling
ACPI handling will enable your virtual machine to take care of shutdown and restart events that are received from a remote machine. We will install the acipd package for the same:
--addpkg acipd
The complete command
So, the final command with the parameters that we discussed previously would look like this:
sudo vmbuilder kvm ubuntu --suite trusty --flavour virtual
--arch amd64 -o --libvirt qemu:///system --ip 192.168.0.10
--part vmbuilder.partition --user user --name user --pass password
--firstboot first_boot.sh --firstlogin first_login.sh
--addpkg unattended-upgrades --addpkg acipd
Summary
In this article, we discussed various virtualization techniques. We discussed virtualization as well as the tools and packages that help in creating and running a virtual machine. Also, you learned about the ways we can view, manage, connect to, and make use of the applications running on the virtual machine. Then, we saw the lightweight version of Ubuntu that is fine-tuned to run virtualization and applications on a virtual platform. At the later stages of this article, we covered how to build a virtual machine from a command line, how to add packages, how to set up user profiles, and the steps for first boot and first login.
Resources for Article:
Further resources on this subject:

 United States
 Great Britain
 India
India
 Germany
 France
 Canada
 Russia
 Spain
Spain
 Brazil
 Australia
 Singapore
 Hungary
 Ukraine
 Luxembourg
 Estonia
 Lithuania
 South Korea
 Turkey
 Switzerland
 Colombia
 Taiwan
 Chile
Chile
 Norway
 Ecuador
 Indonesia
 New Zealand
 Cyprus
 Denmark
 Finland
 Poland
 Malta
Malta
 Czechia
 Austria
 Sweden
 Italy
Italy
 Egypt
Egypt
 Belgium
 Portugal
 Slovenia
 Ireland
 Romania
 Greece
 Argentina
 Netherlands
 Bulgaria
 Latvia
 South Africa
 Malaysia
 Japan
Japan
 Slovakia
 Philippines
 Mexico
 Thailand


